Imagine you have a Salesforce app that people all over the world use. You want everyone to see messages in their language. Custom labels make this possible! They help you create text that can change based on the user’s language settings. Plus, they keep all your important text values in one place, making it easier to manage and update them. Today, we’ll dive into how to access custom labels in Apex, ensuring your app is user-friendly and efficient for everyone.
In Salesforce, a Custom Label is a metadata feature that allows developers to create, manage, and reference static text values in their applications. These text values can be utilized across Apex classes, Visualforce pages, and Lightning components. Custom labels support localization, enabling the creation of multilingual applications by providing translated text values that can be dynamically displayed based on the user’s language settings. For a deeper dive into Salesforce development, check out our guide on creating a free Salesforce Developer Org.
It is a feature in Salesforce that allows you to create custom text values that can be referenced from Apex classes, Visualforce pages, or Lightning components. We can create up to 5000 custom labels in our org and 1000 characters can be provided in length.
Table of Contents
Benefits of Using Custom Labels
Custom labels have several benefits that make them a must-use tool in Salesforce development.
Localization and Multi-Language Support: Localization means making your app usable for people in different parts of the world, with different languages. Custom labels make this super easy. You create a label once, and then you can add translations for all the languages your users speak.
For example:
- English: “Welcome to our app!”
- Spanish: “¡Bienvenido a nuestra aplicación!”
- French: “Bienvenue dans notre application !”
Centralized Management of Text Values: Imagine you have the same welcome message in 20 different places in your app. If you need to change it, you’d have to update it in all 20 places. What a headache! With custom labels, you save the message in one place. When you need to change it, you just update the label, and it changes everywhere in your app.
Consistency and Maintainability in Code: Custom labels help keep your code clean and consistent. Instead of hard-coding text values in your code, you use labels. This makes your code easier to read and maintain. Plus, it’s easier to find and fix mistakes because all your text is in one place.
Creating a Custom Label in Salesforce
To create a custom label, follow these steps :
- Navigate to Setup.
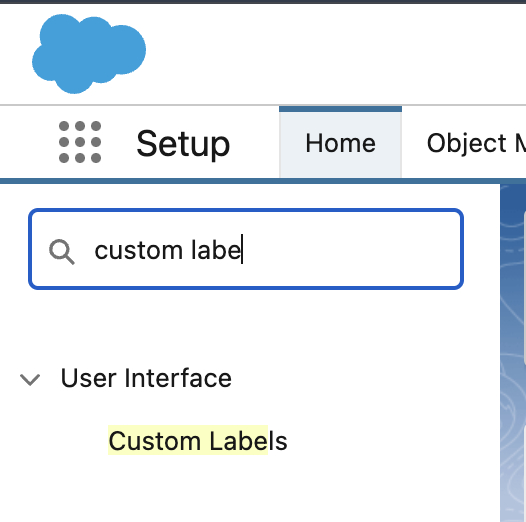
- In the Quick Find box, type Custom Labels and select it.
- Click on New Custom Label.

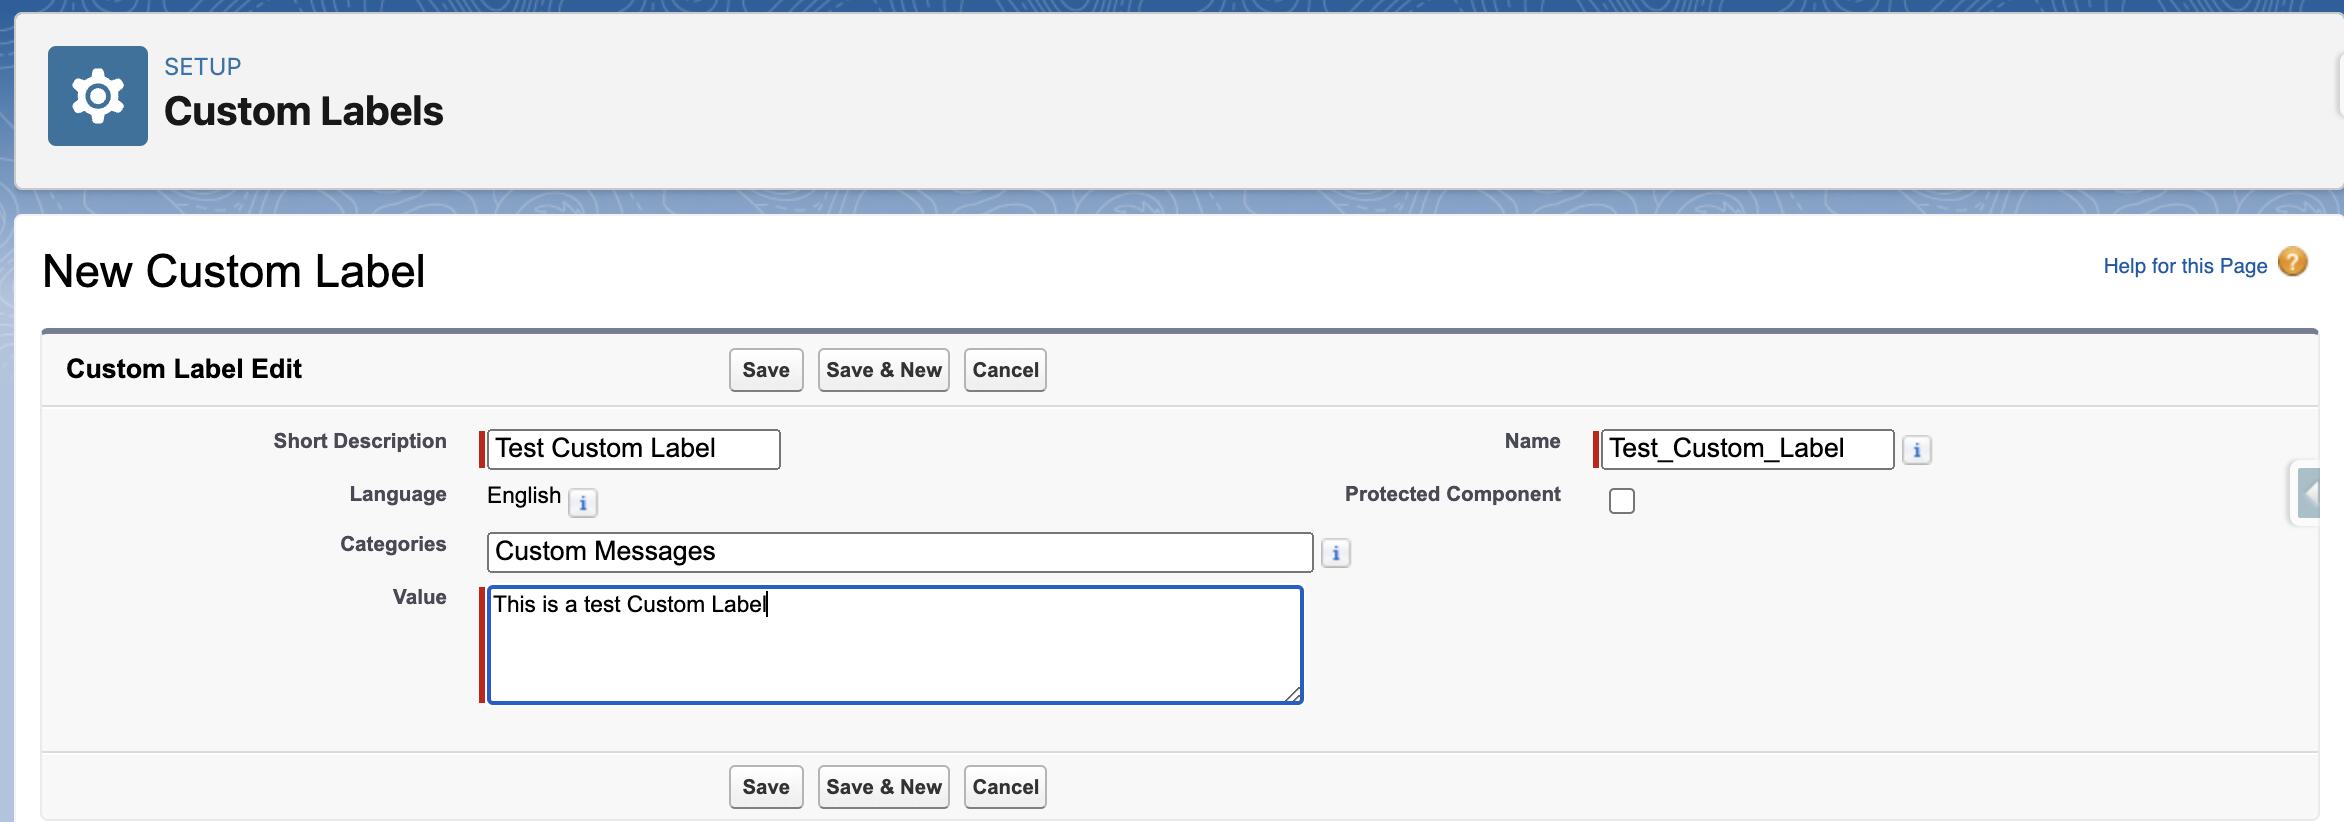
- Fill in the Details:
- Label
- Name(This will automatically filled ).
- Value.
- Description(Optionally, you can add a description).
- Click Save.
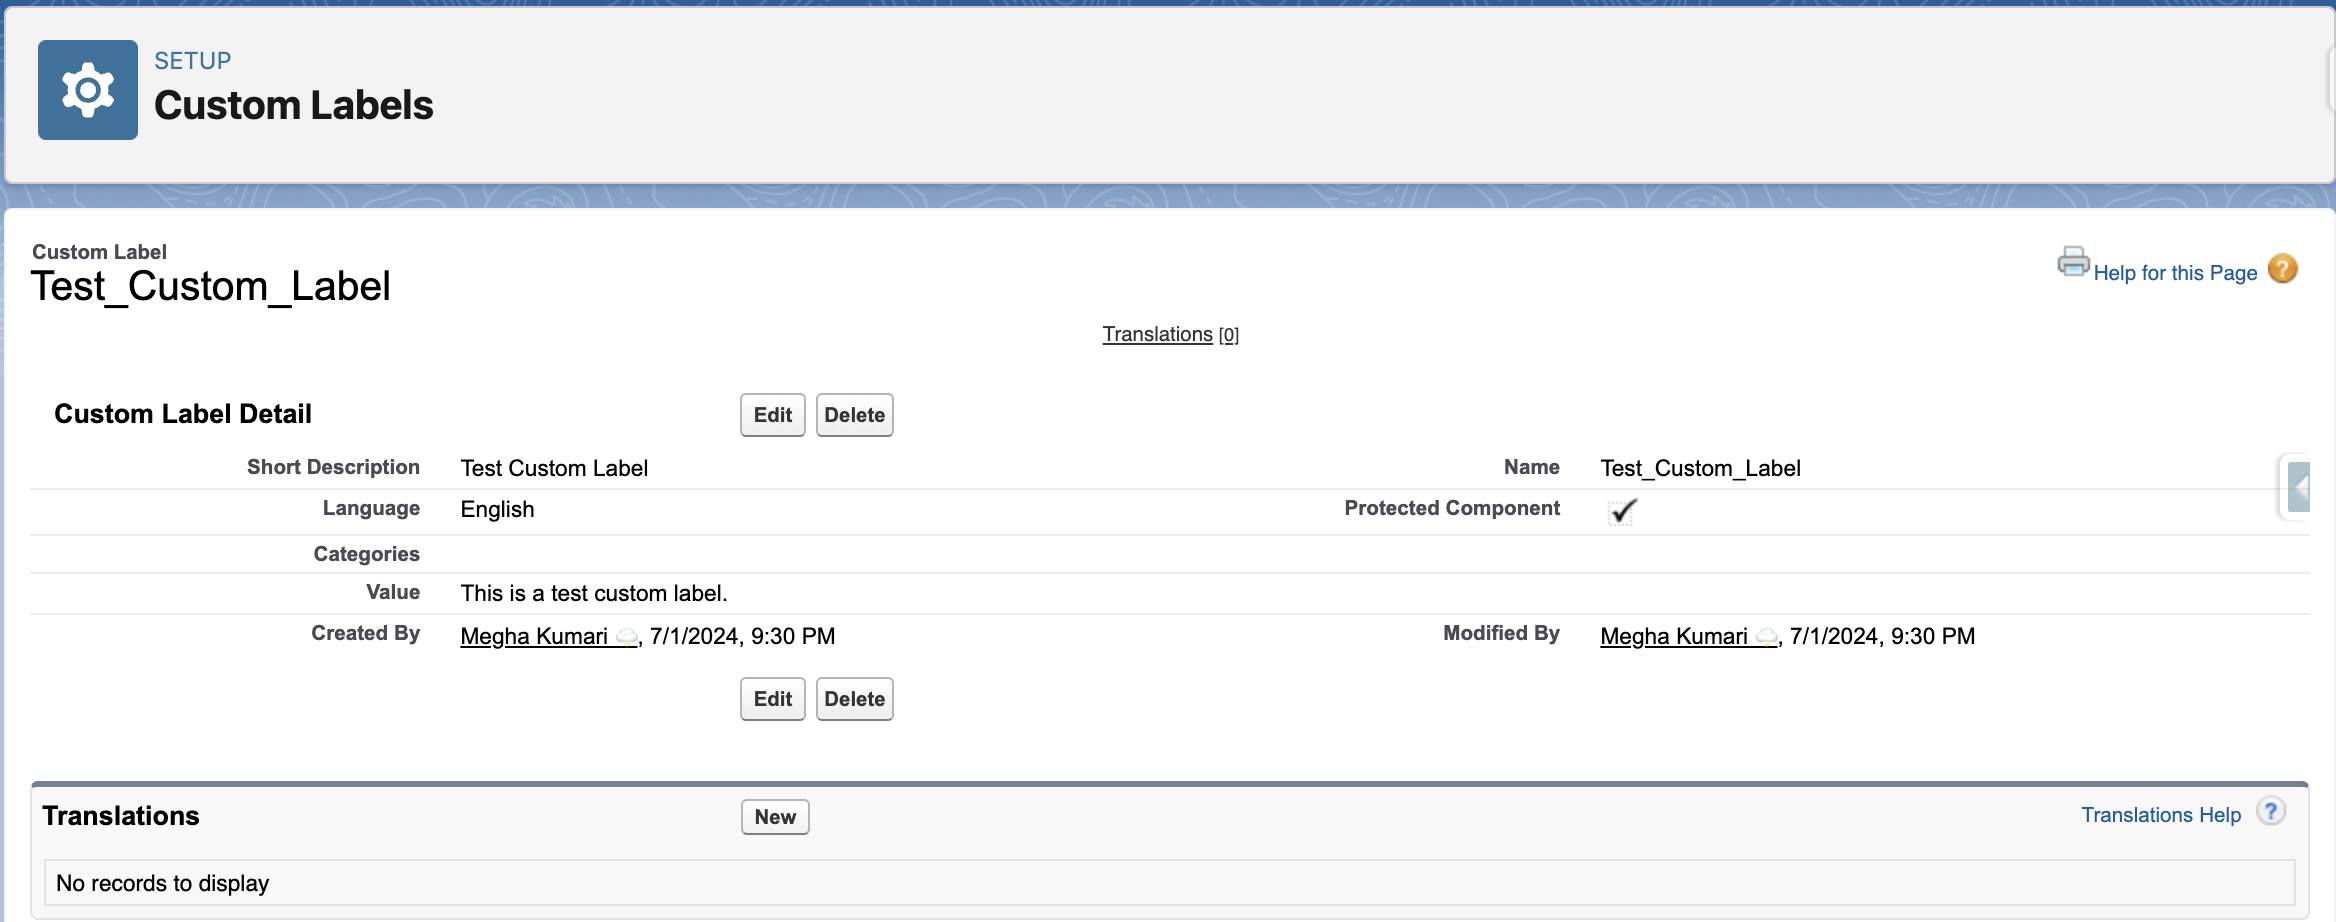
Now you know what custom labels are, why they’re awesome, and how to create and use them.
How to Access Custom Labels In Salesforce
Custom labels in Salesforce are essential for managing static text values in a way that is both consistent and adaptable to multiple languages. Accessing these labels in Apex classes and Lightning Web Components (LWC) is straightforward and allows you to create a more flexible and maintainable application.
Accessing Custom Labels in Apex Class
To access custom labels in Apex, you use the Label global variable followed by the API name of the custom label. Here’s how you can do it step-by-step:
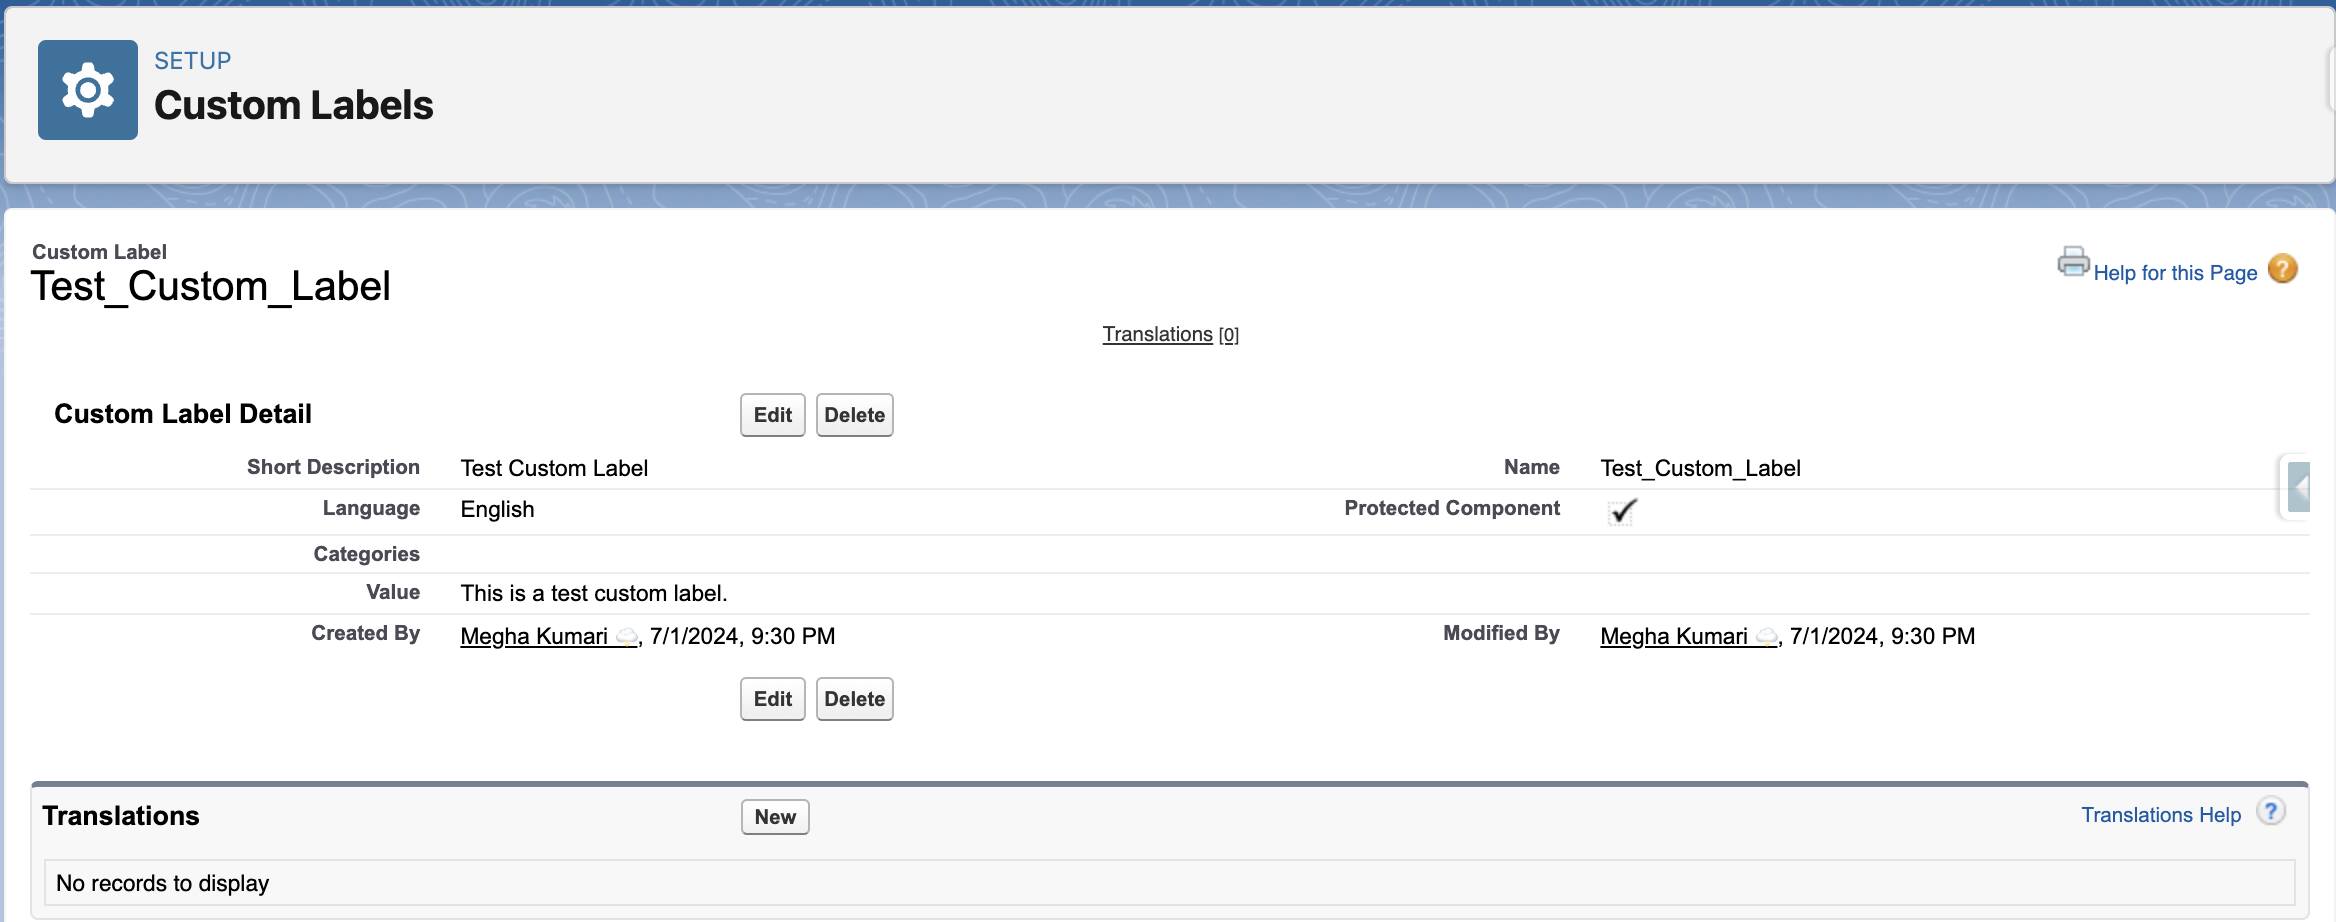
- Create a Custom Label
- Use the Custom Label in Apex
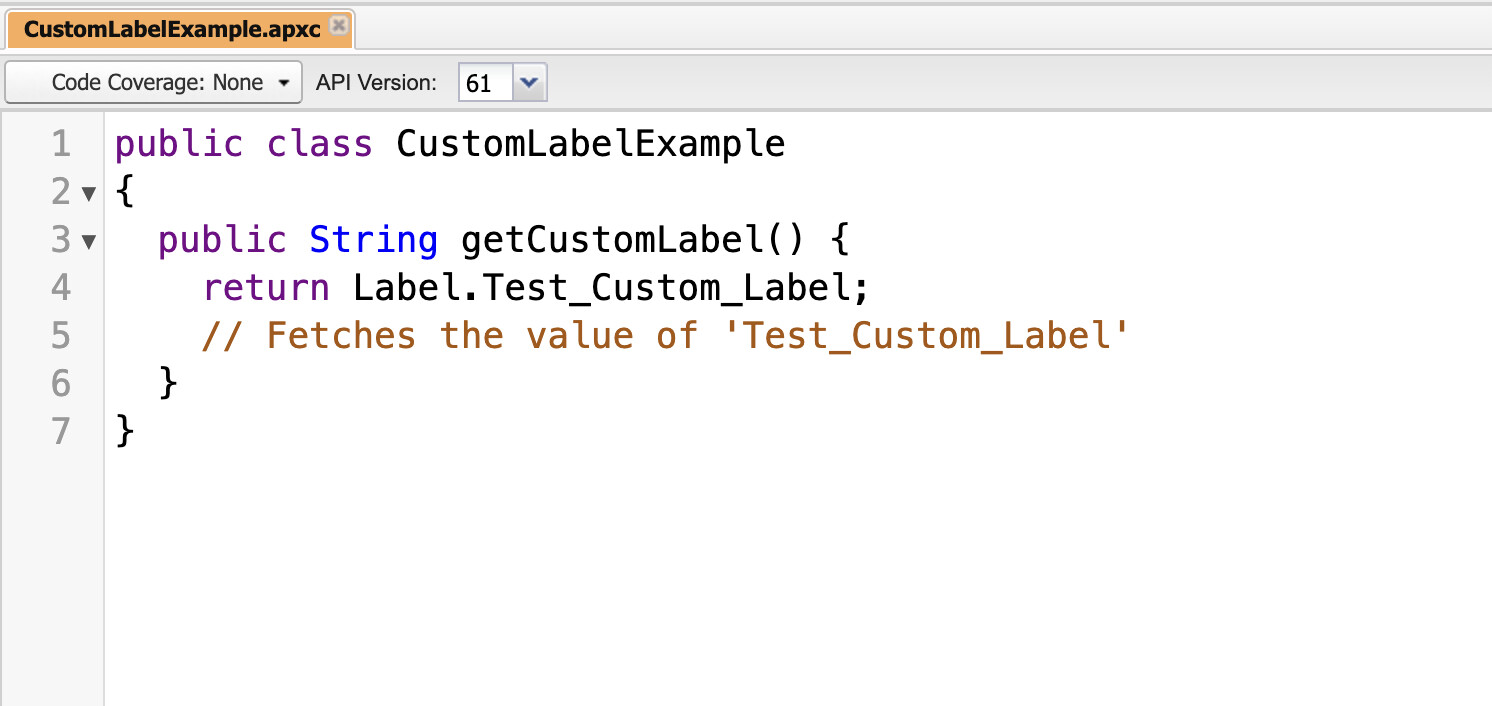
public class CustomLabelExample
{
  public String getCustomLabel() {
    return Label.Test_Custom_Label;
    // Fetches the value of 'Test_Custom_Label'
  }
}
In this example, Label.Test_Custom_Label retrieves the value of the custom label Test_Custom_Label. When the getCustomLabel the method is called, it returns the text This is a test custom label.
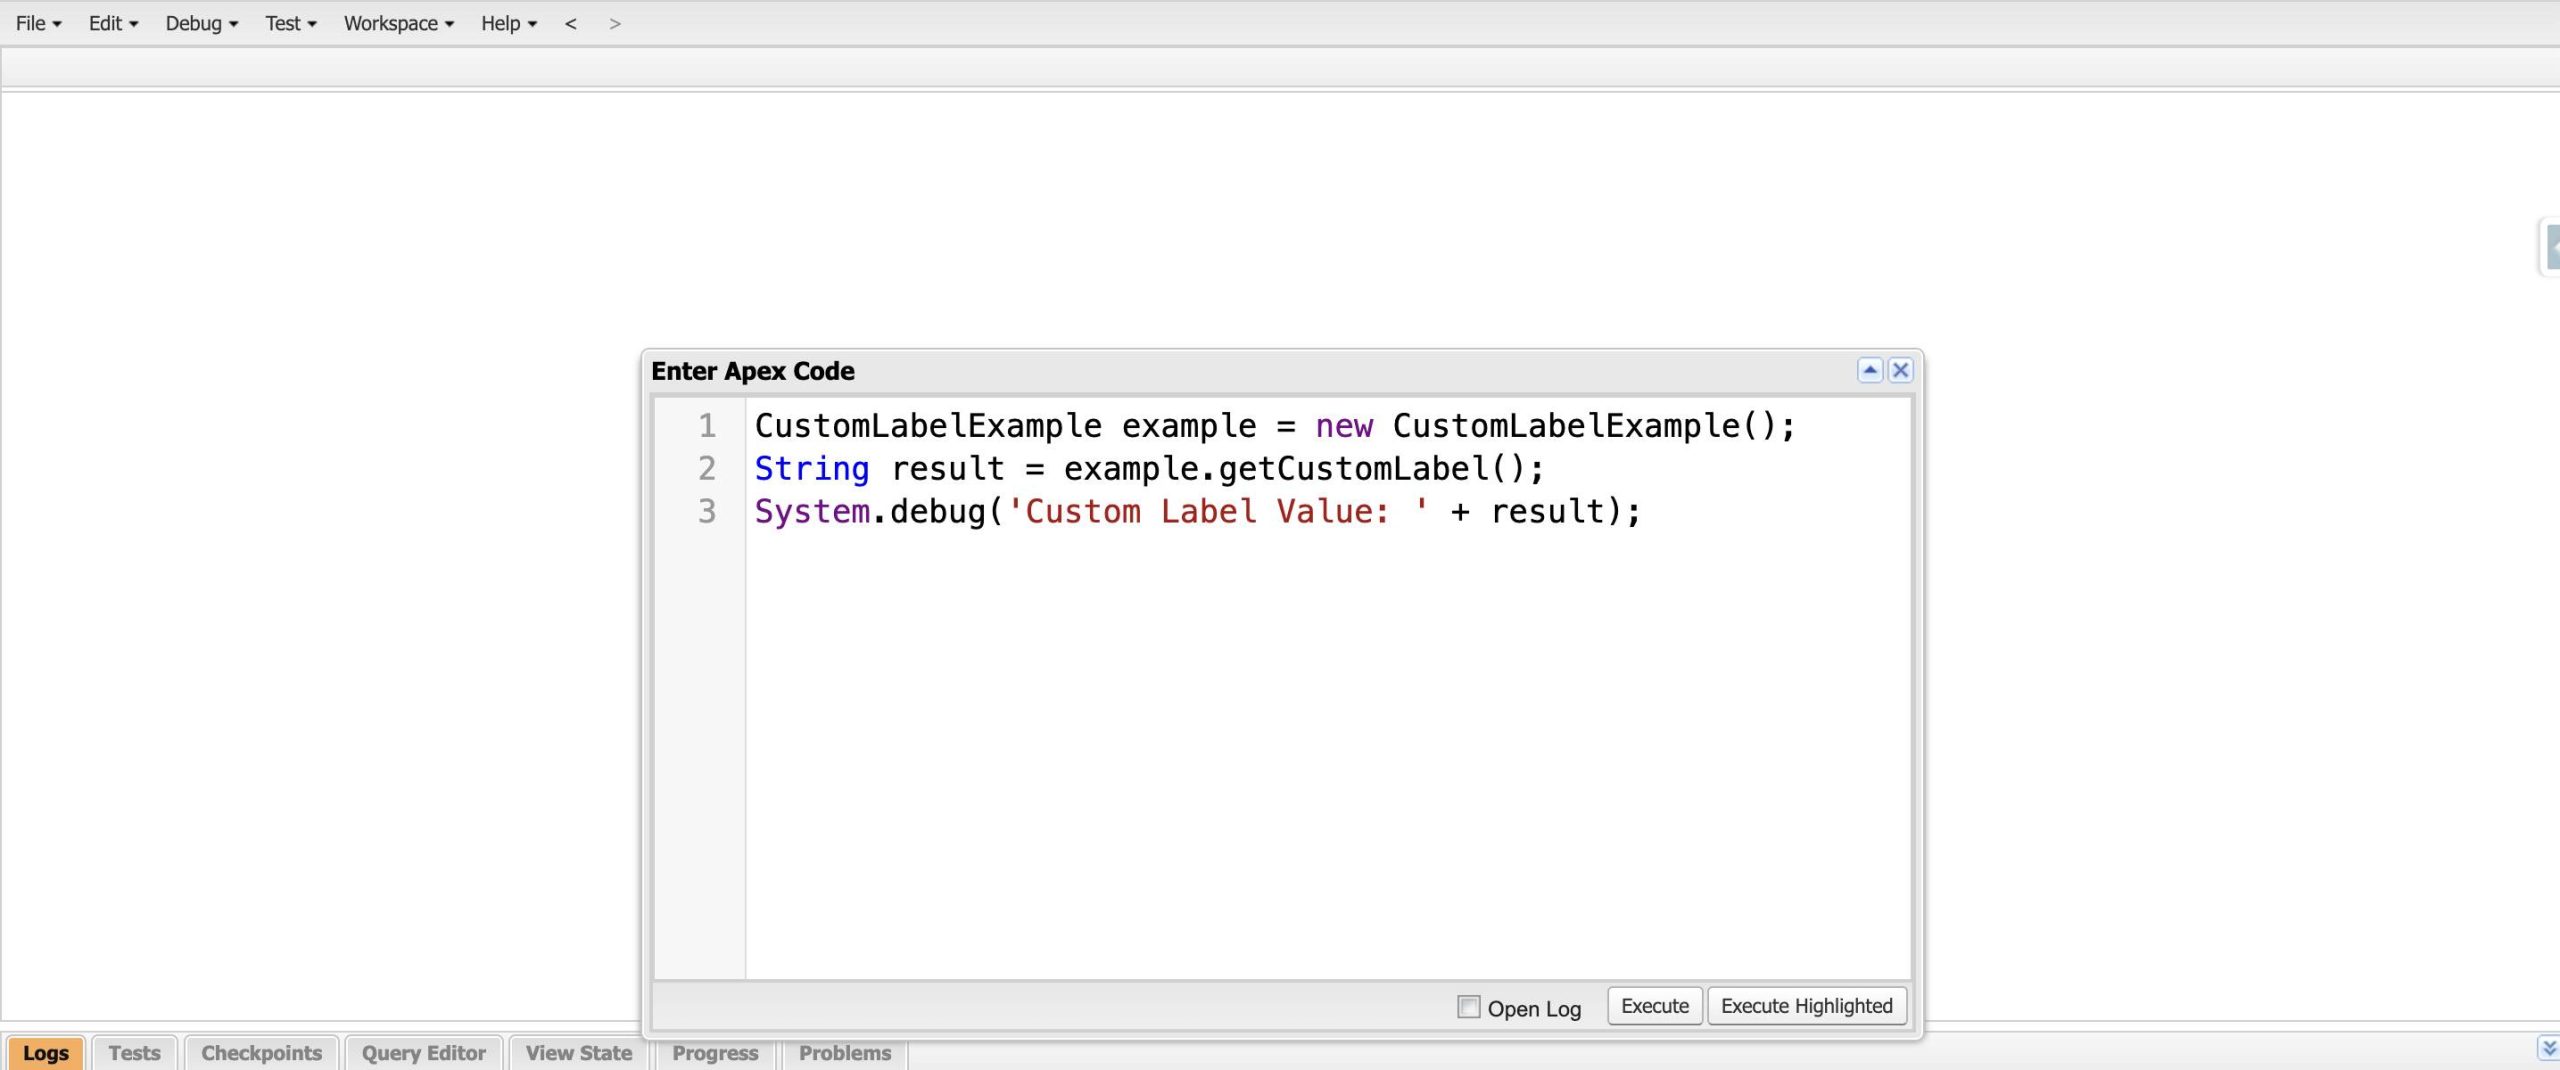
Now, execute this class from the anonymous window by clicking on Debug –> Open Execute Anonymous Window –> Make sure to check the Open Log checkbox.
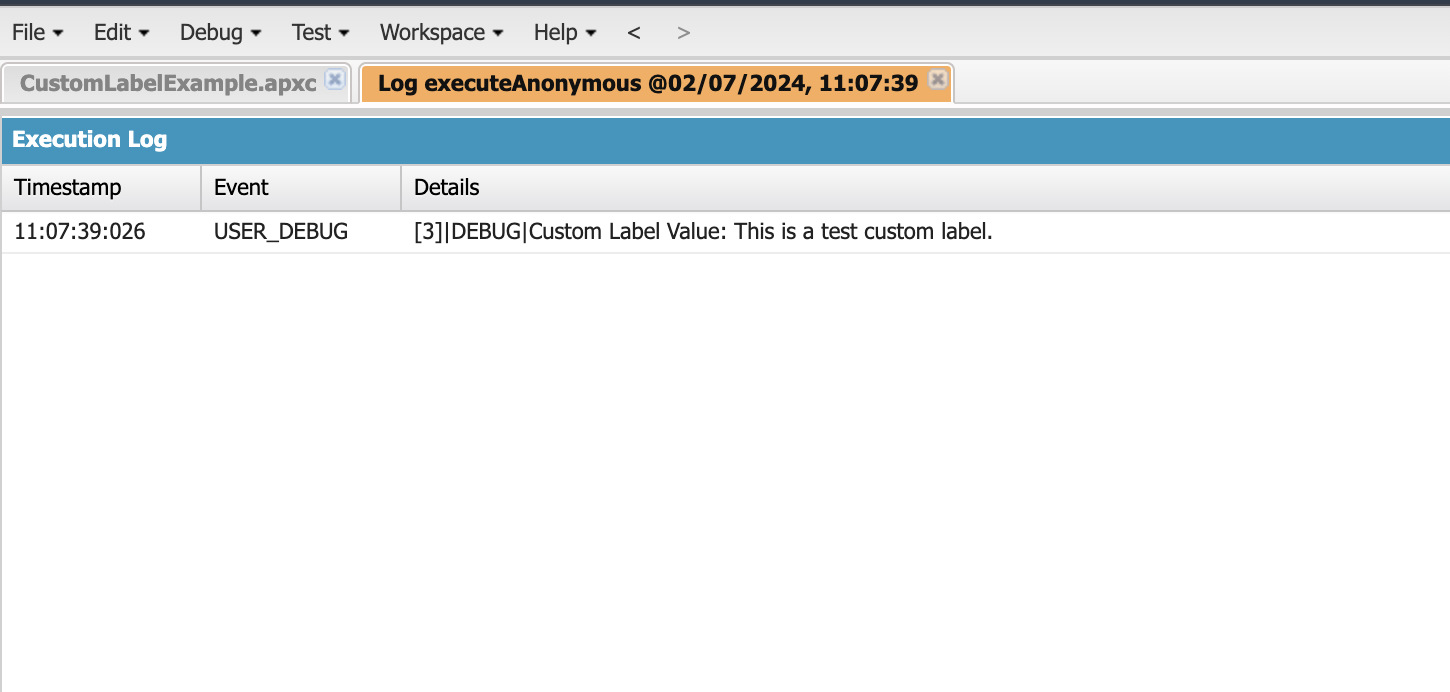
Click on Execute and then open logs. Check on the Debug Only checkbox. We will get this below output Custom label is Text coming from custom label.
Accessing Custom Labels in Lightning Web Components (LWC)
In LWC, accessing custom labels requires a slightly different approach, involving JavaScript and HTML. Here’s how you can do it step-by-step:
- Create a Custom Label: Follow the same steps as mentioned above to create a custom label.
- Import the Custom Label in the LWC JavaScript File: In this example, the custom label
Test_Custom_Labelis imported from Salesforce and assigned to thewelcomeMessageproperty.
// Import the custom label
import WELCOME_MESSAGE from '@salesforce/label/c.Test_Custom_Label';
export default class MyComponent extends LightningElement {
  // Assign the custom label to a property
    welcomeMessage = WELCOME_MESSAGE;
} - Use the Custom Label in the LWC HTML Template:
{welcomeMessage}is used to dynamically display the value of the custom label.
<template> <h1>{welcomeMessage}</h1> </template>For more advanced usage, check out our guide on Batch Apex.
Customizing Email Templates
Emails are an important part of user communication. Custom labels help you manage and update email content easily. You can create custom labels for different parts of your email templates, like greetings, body text, and signatures.
Create a custom label called Email_Greeting with the text Hello, [User]!
public class EmailTemplateController {
    public String getEmailGreeting(String userName) {
        String greeting = Label.Email_Greeting;
        return greeting.replace('[User]', userName);
    }
}
In this code, the getEmailGreeting method takes the user’s name as an input, replaces [User] in the greeting with the actual name, and returns the personalized greeting.
Best Practices for Using Custom Labels
Using custom labels in Salesforce is a great way to keep your app organized and user-friendly. Here are some best practices to help you get the most out of custom labels.
Naming Conventions for Custom Labels
Naming your custom labels properly is super important. Good names make it easy to understand what each label is for, even at a glance.
Tips for Naming Custom Labels:
- Be Descriptive: The name should describe what the label is used for. For example, use
Error_Messagefor an error message. - Use Consistent Prefixes: Start labels with a prefix that groups similar labels together. For instance, use
Email_for all email-related labels, likeEmail_GreetingandEmail_Signature. - Avoid Special Characters: Stick to letters, numbers, and underscores to keep names simple and compatible with Apex code.
Example:
- Good Name:
Welcome_Message - Bad Name:
msg1
Keeping Labels Organized and Documented
Keeping your labels organized and documented helps you and your team know exactly what each label is for and where it is used.
Tips for Organization and Documentation:
- Group by Purpose: Organize labels by their purpose or the part of the app they are used in. Use folders or naming prefixes.
- Use Descriptions: Always fill in the description field when creating a label. Describe what the label is for and where it’s used.
- Documentation: Maintain a document or spreadsheet with all your custom labels, their values, and their descriptions. This makes it easy to track and update labels.
Example of a Document:
| Label Name | Value | Description |
|---|---|---|
| Welcome_Message | Welcome to our app! | Greeting message for users |
| Error_Message | An unexpected error occurred. | General error message |
| Email_Greeting | Hello, [User]! | Greeting used in emails |
Regularly Reviewing and Updating Labels
Regular reviews and updates ensure that your custom labels are up-to-date and still relevant.
- Scheduled Reviews: Set a regular schedule (like quarterly) to review all custom labels. Check if they are still needed and if their values are correct.
- Feedback Loop: Encourage your team to report any issues or improvements for labels. Update them based on feedback.
- Audit Changes: Keep track of changes made to labels. This helps in understanding why a change was made and who made it.
Conclusion
Custom labels are a small but mighty feature in Salesforce that can significantly enhance your application’s usability and maintainability. By incorporating custom labels into your development practices, you can ensure your app is ready to meet the needs of a diverse, global user base.
I encourage you to start using custom labels in your projects. They offer a centralized way to manage text values, improve code readability, and make your app more adaptable to different languages. If you have any tips or experiences with using custom labels, please share them in the comments below. Let’s learn and grow together as a Salesforce community.
For more advanced topics, don’t miss our posts on Queueable Apex in Salesforce and Rollup Summary Trigger for Lookup Relationship.
Thank you for joining me on this journey through custom labels. Don’t forget to subscribe to Salesforce Megha for more tips and tutorials to help you on your Salesforce journey. Happy coding!

