
Have you ever worked with Salesforce and thought, “I wish there was an easier way to see and manage my data”? Well, let me introduce you to Salesforce Inspector Reloaded, a super handy Chrome extension that’s like a magical toolbox for Salesforce admins and developers.
Salesforce Inspector Reloaded is a free extension that you can add to your Chrome browser or Firefox. Once installed, it adds a small icon to your browser that gives you quick access to all sorts of useful Salesforce tools. With Salesforce Inspector, you can easily search for objects and fields, run SOQL (Salesforce Object Query Language) queries, export and import data, and even see detailed metadata about your Salesforce objects.
This tool has become popular because it saves a lot of time and makes working with Salesforce much easier. Whether you’re an admin who needs to manage lots of data or a developer working on custom Salesforce solutions, Salesforce Inspector can be a real game-changer.
Table of Contents
Why ‘Reloaded’?
So, why are we calling this “Salesforce Inspector Reloaded”? Well, over time, Salesforce Inspector has added some awesome new features and updates that make it even more powerful than before.
Here are a few reasons why this tool deserves a fresh look:
- Enhanced Data Export and Import: The latest updates have made it much easier to export and import data. You can now handle larger data sets and do it more quickly.
- Better SOQL Query Execution: Running queries is now smoother and faster, and you get better insights from your data.
- Improved User Interface: The interface has been revamped to be more user-friendly, making it simpler to navigate and use all the features.
- Advanced Metadata Access: You can now see even more detailed metadata information, which is super helpful for development and troubleshooting.
With these updates, Salesforce Inspector has become an even more essential tool for anyone working with Salesforce. In the following sections, we’ll dive deeper into these features and show you how to use them effectively.
This section briefly introduces what Salesforce Inspector is and why it’s essential, especially with the latest updates. Next, we’ll move on to the core features, starting with Quick Object Search and Navigation.
How to Install Salesforce Inspector Reloaded?
Alright, let’s get you set up with Salesforce Inspector Reloaded. Installing this awesome Chrome extension is super easy and quick. Just follow these simple steps, and you’ll be ready to use all the fantastic features of Salesforce Inspector.
Step 1: Open Google Chrome
First things first, make sure you’re using the Google Chrome browser. Salesforce Inspector is a Chrome extension, so it only works with Chrome.
Step 2: Go to the Chrome Web Store
Next, open a new tab in Chrome and go to the Chrome Web Store. You can do this by typing “Chrome Web Store” into the search bar and clicking on the first result, or you can go directly to the Chrome Web Store.

Step 3: Search for Salesforce Inspector
In the Chrome Web Store, there’s a search bar at the top left. Type “Salesforce Inspector” into the search bar and press Enter.
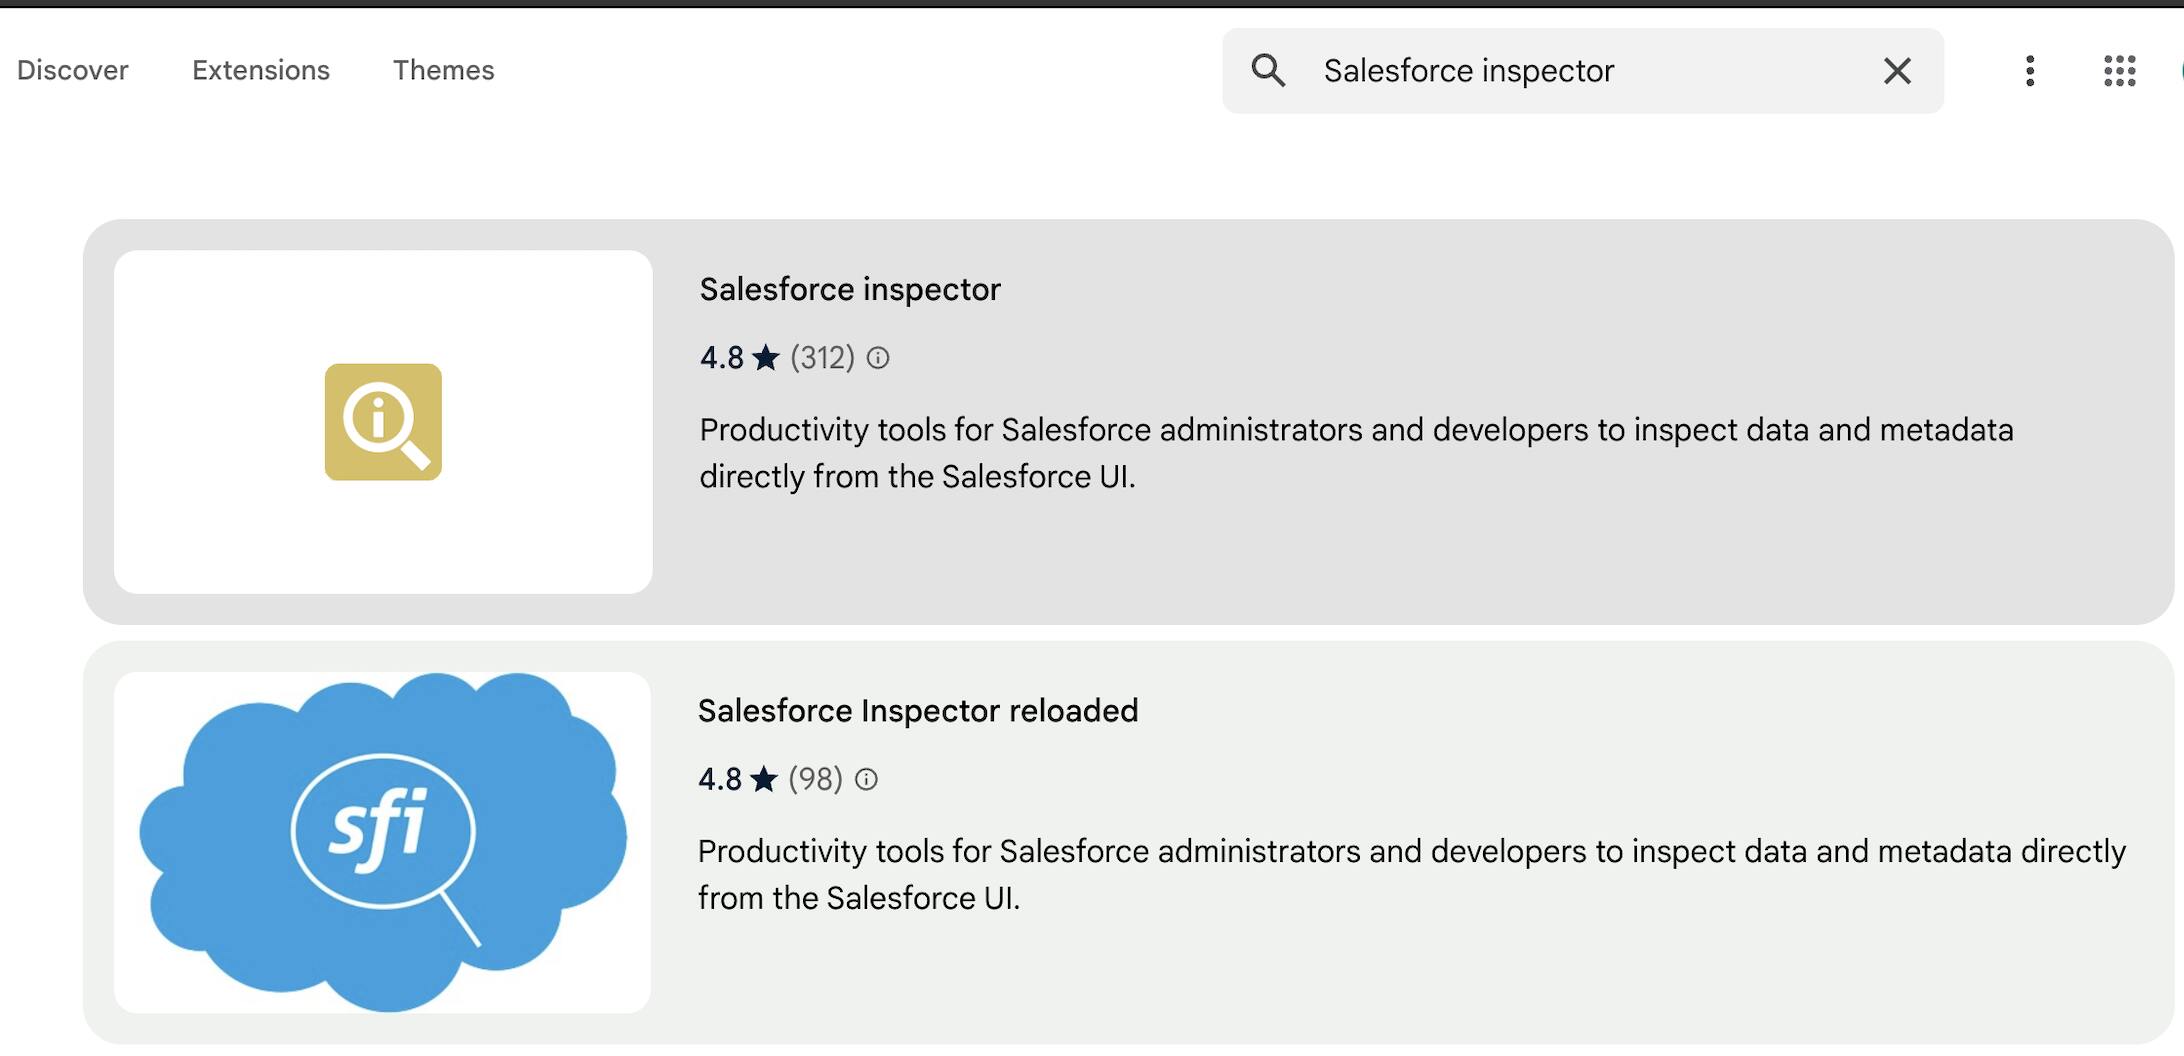
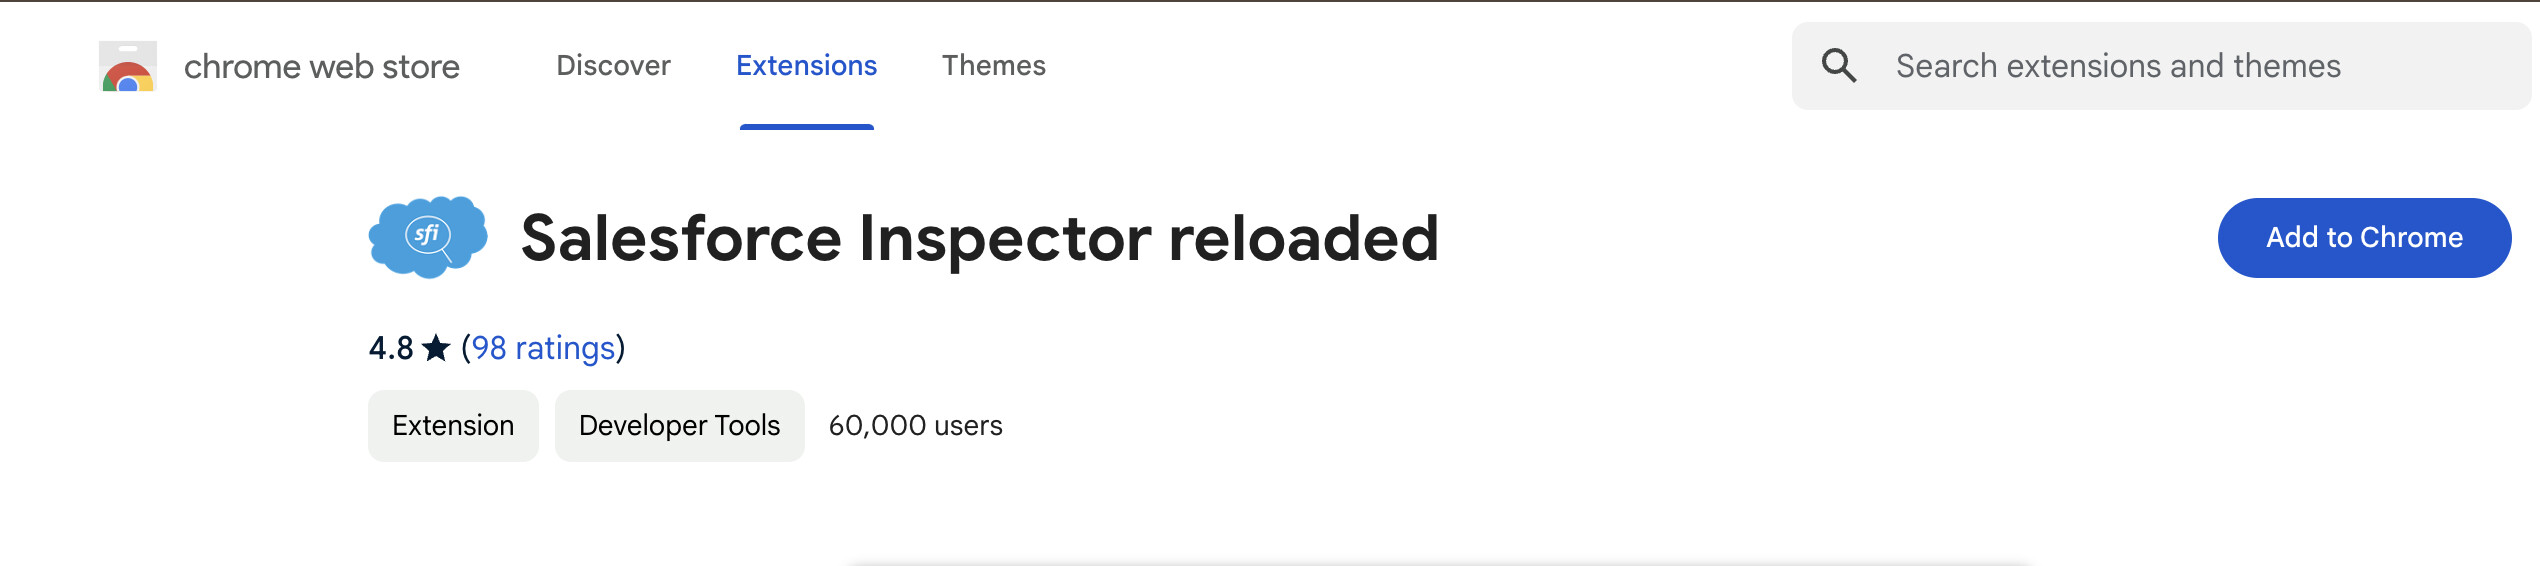
Step 4: Add to Chrome
You should see Salesforce Inspector in the search results. Click on the “Add to Chrome” button next to it.
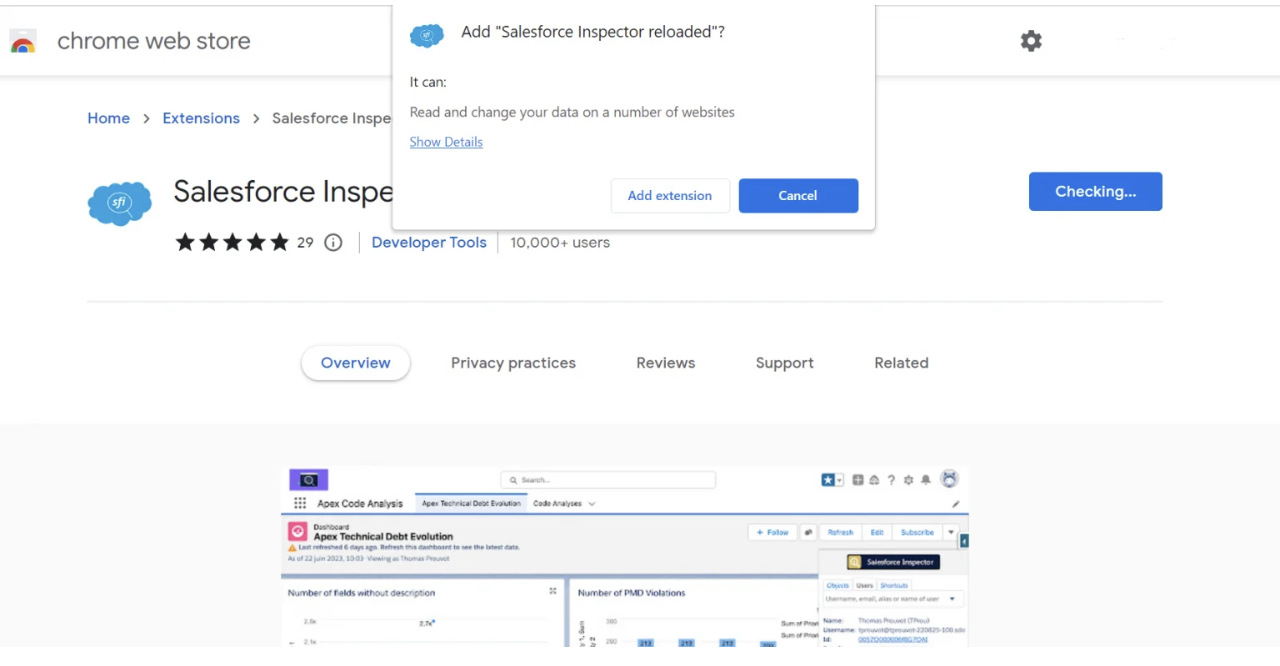
Step 5: Confirm Installation
A pop-up will appear asking you to confirm that you want to add the extension. Click “Add Extension.” Chrome will download and install Salesforce Inspector, and a small icon will appear in the top right corner of your browser.
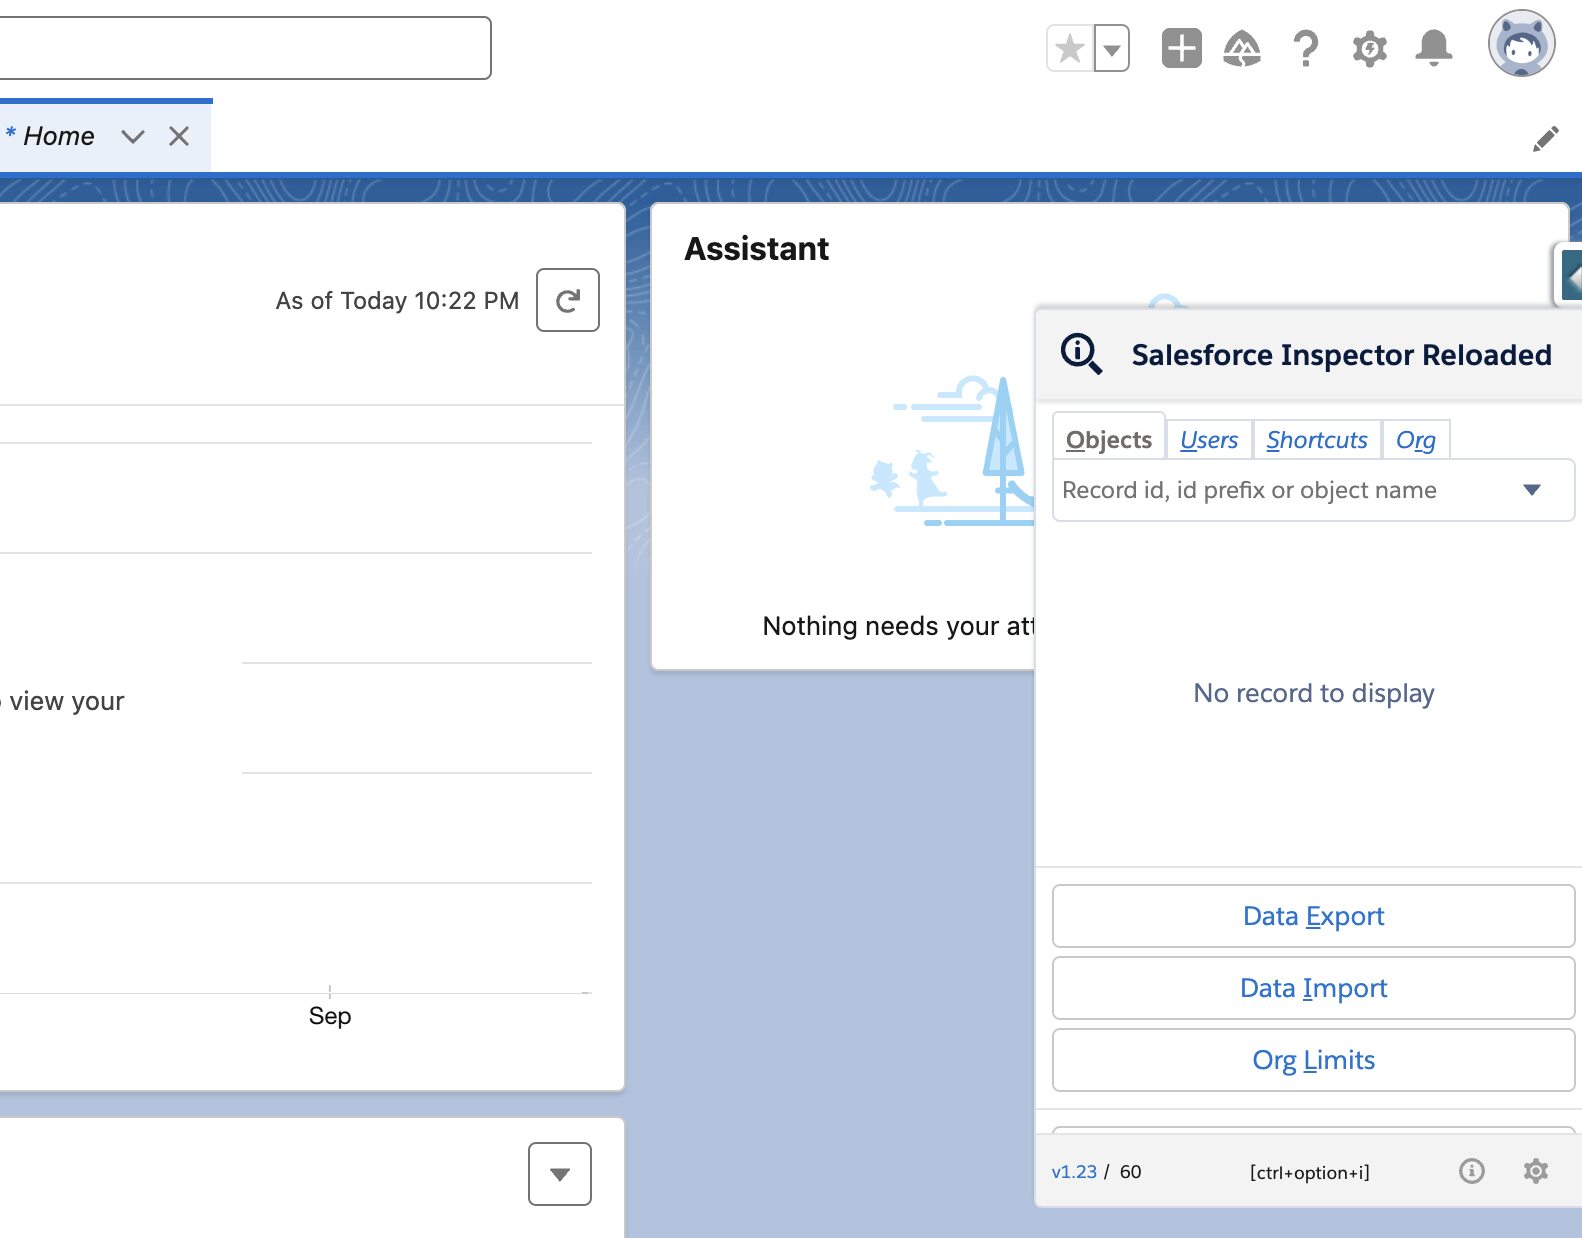
Step 6: Open Salesforce and Start Using Inspector
Now that you have Salesforce Inspector installed, open your Salesforce account. Click on the small Salesforce Inspector icon in the top right corner of your browser to open the extension.
And that’s it! You’ve successfully installed Salesforce Inspector Reloaded. Now you’re ready to explore all the amazing features that will make your Salesforce experience much smoother and more efficient.
Features of Salesforce Inspector Reloaded
Welcome back! Let’s dive deeper into the key features of Salesforce Inspector Reloaded. This tool has several powerful features that make working with Salesforce much easier. I will walk you through each of these features in a simple, easy-to-understand way.
1. Data Export and Import
Exporting Data: One of the coolest features of Salesforce Inspector Reloaded is its ability to export data easily. Imagine you want to get a list of all your contacts from Salesforce. Here’s how you can do it:
- Open Salesforce Inspector: Click the small icon next to your Chrome address bar.
- Go to the Data Export Tab: Select “Export Data”.
- Choose the Object: Select “Contact” from the list.
- Select Fields: Pick the fields you want, like Id, Name, and Email.
- Click “Export”: Your data will be downloaded as a CSV file.
Here’s a simple query to export contact information:
SELECT Id, Name, Email FROM Contact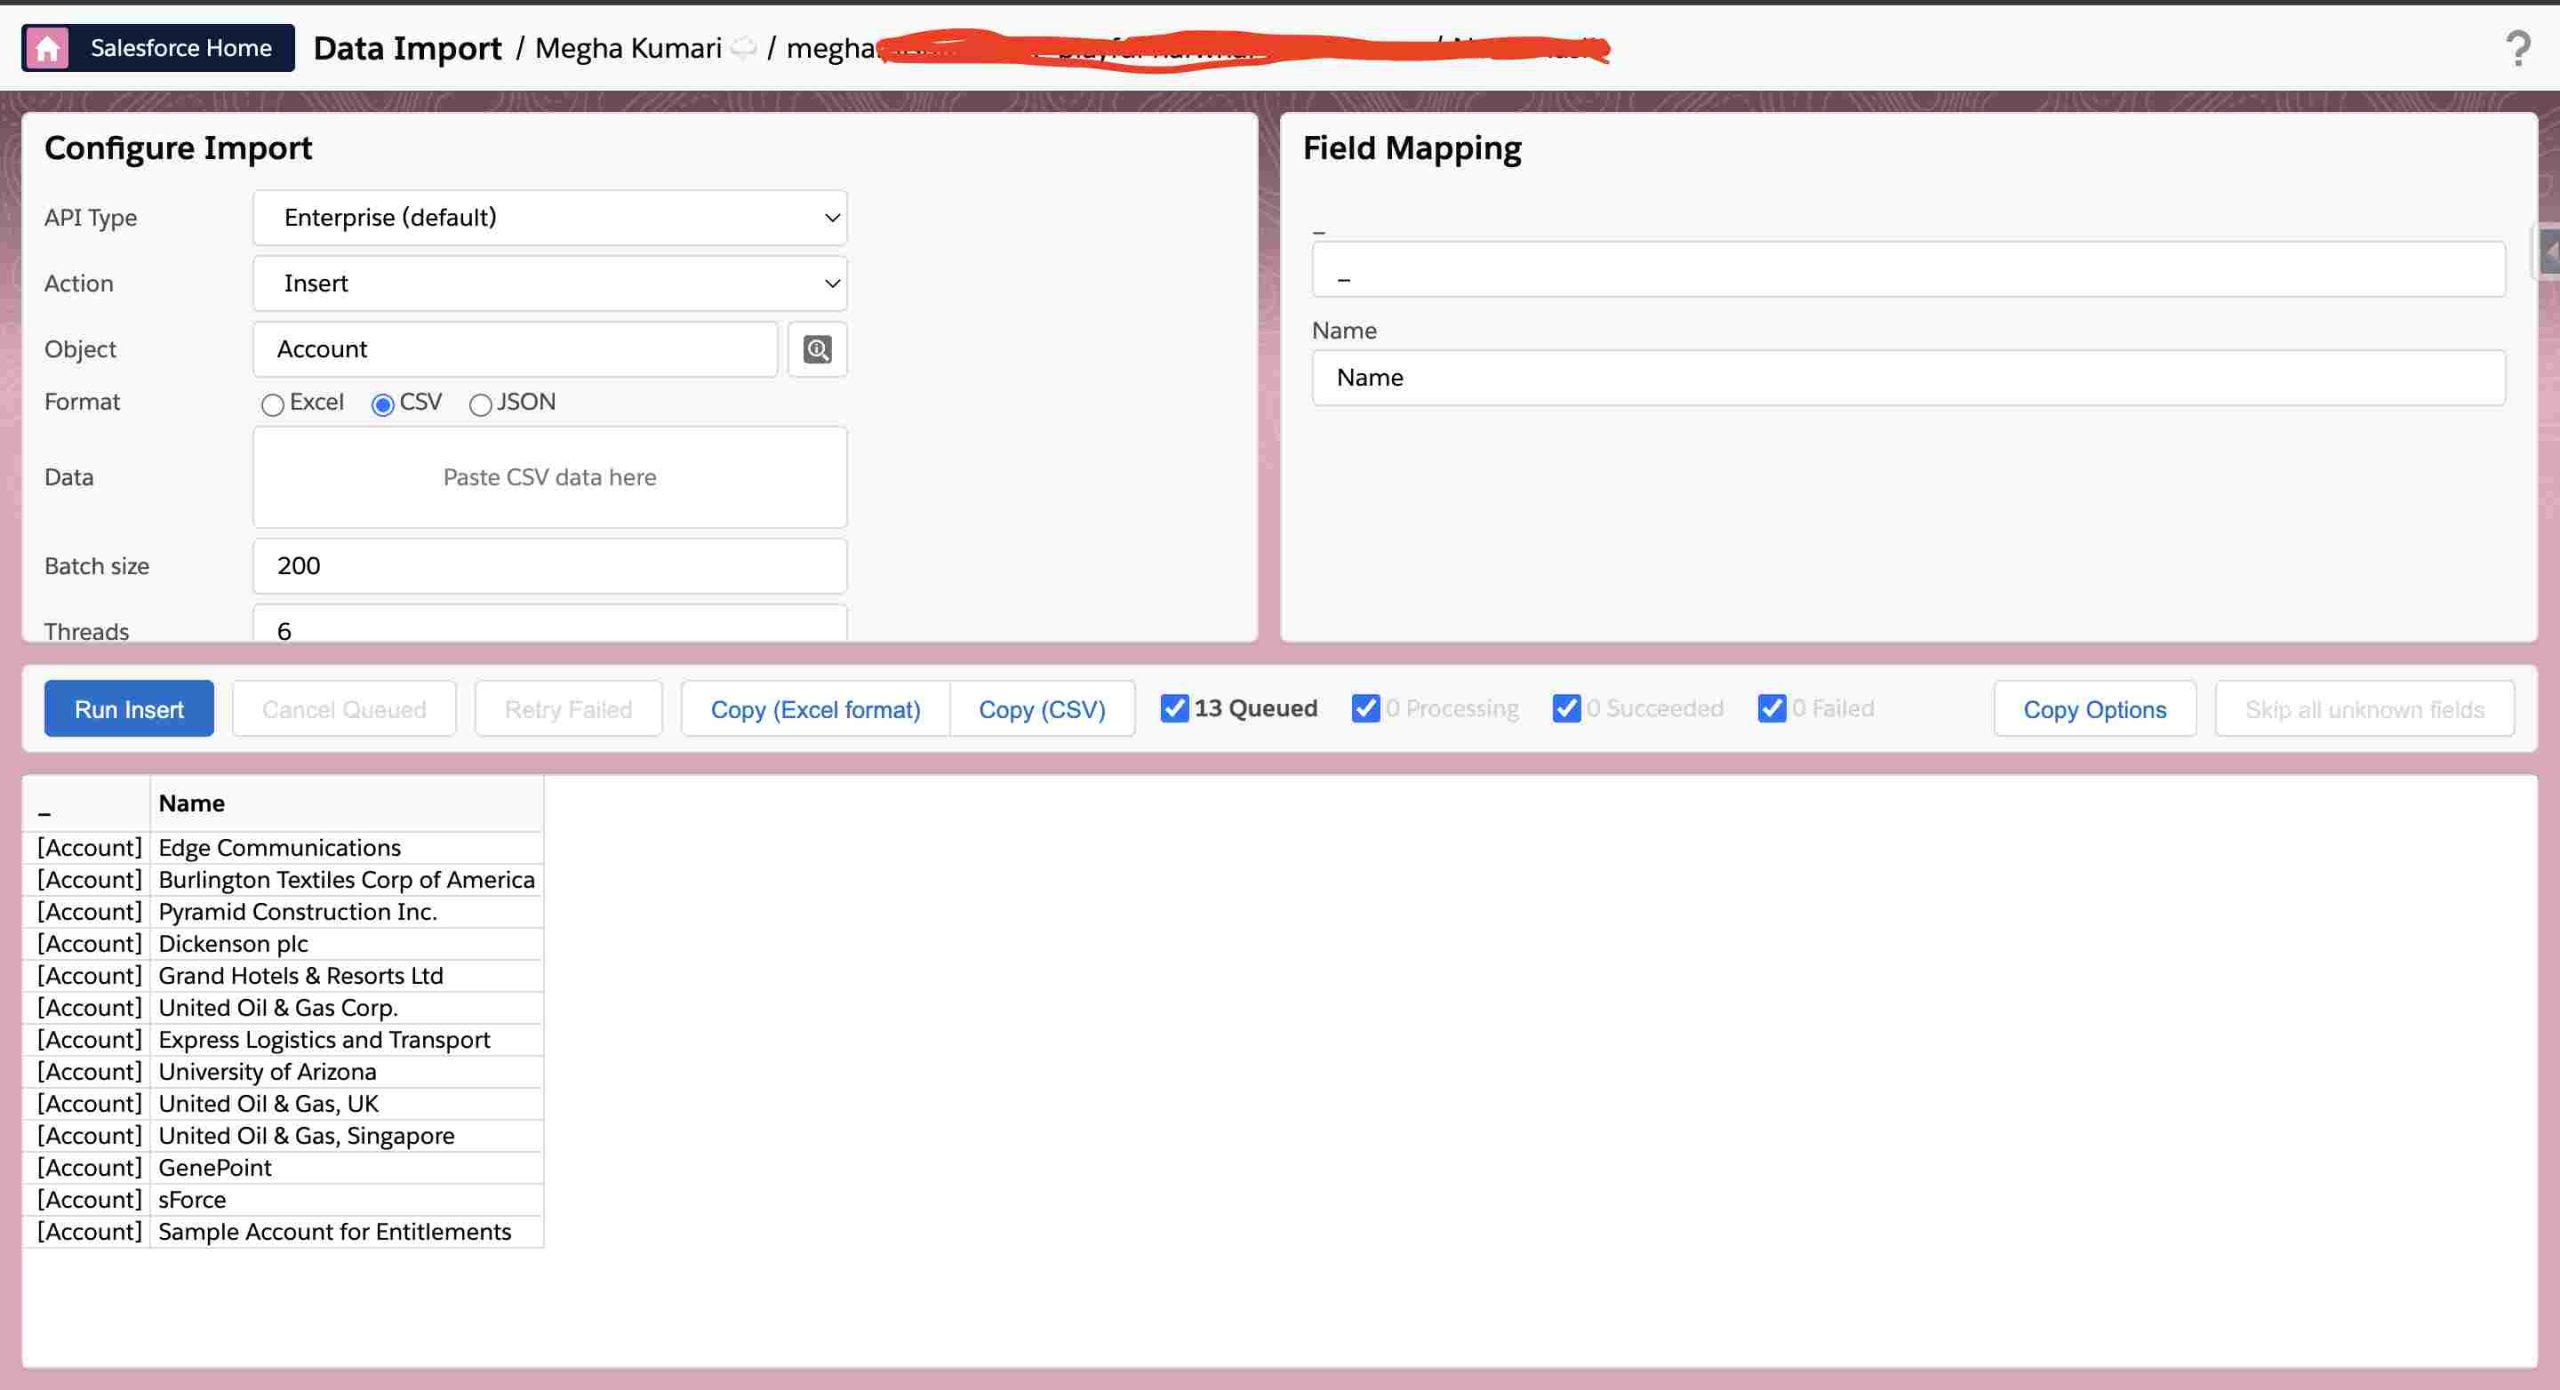
Importing Data: Importing data is just as easy. Suppose you have a CSV file with new contact information and you want to add it to Salesforce:
- Open Salesforce Inspector: Click the extension icon.
- Go to the Data Import Tab: Select “Import Data”.
- Upload Your CSV File: Click “Choose File” and select your CSV file.
- Map Fields: Match the columns in your CSV to Salesforce fields.
- Click “Import”: Your data will be uploaded to Salesforce.
Make sure your CSV file looks something like this:
Id, Name, Email
0031a00000aA1bC, John Doe, [email protected]
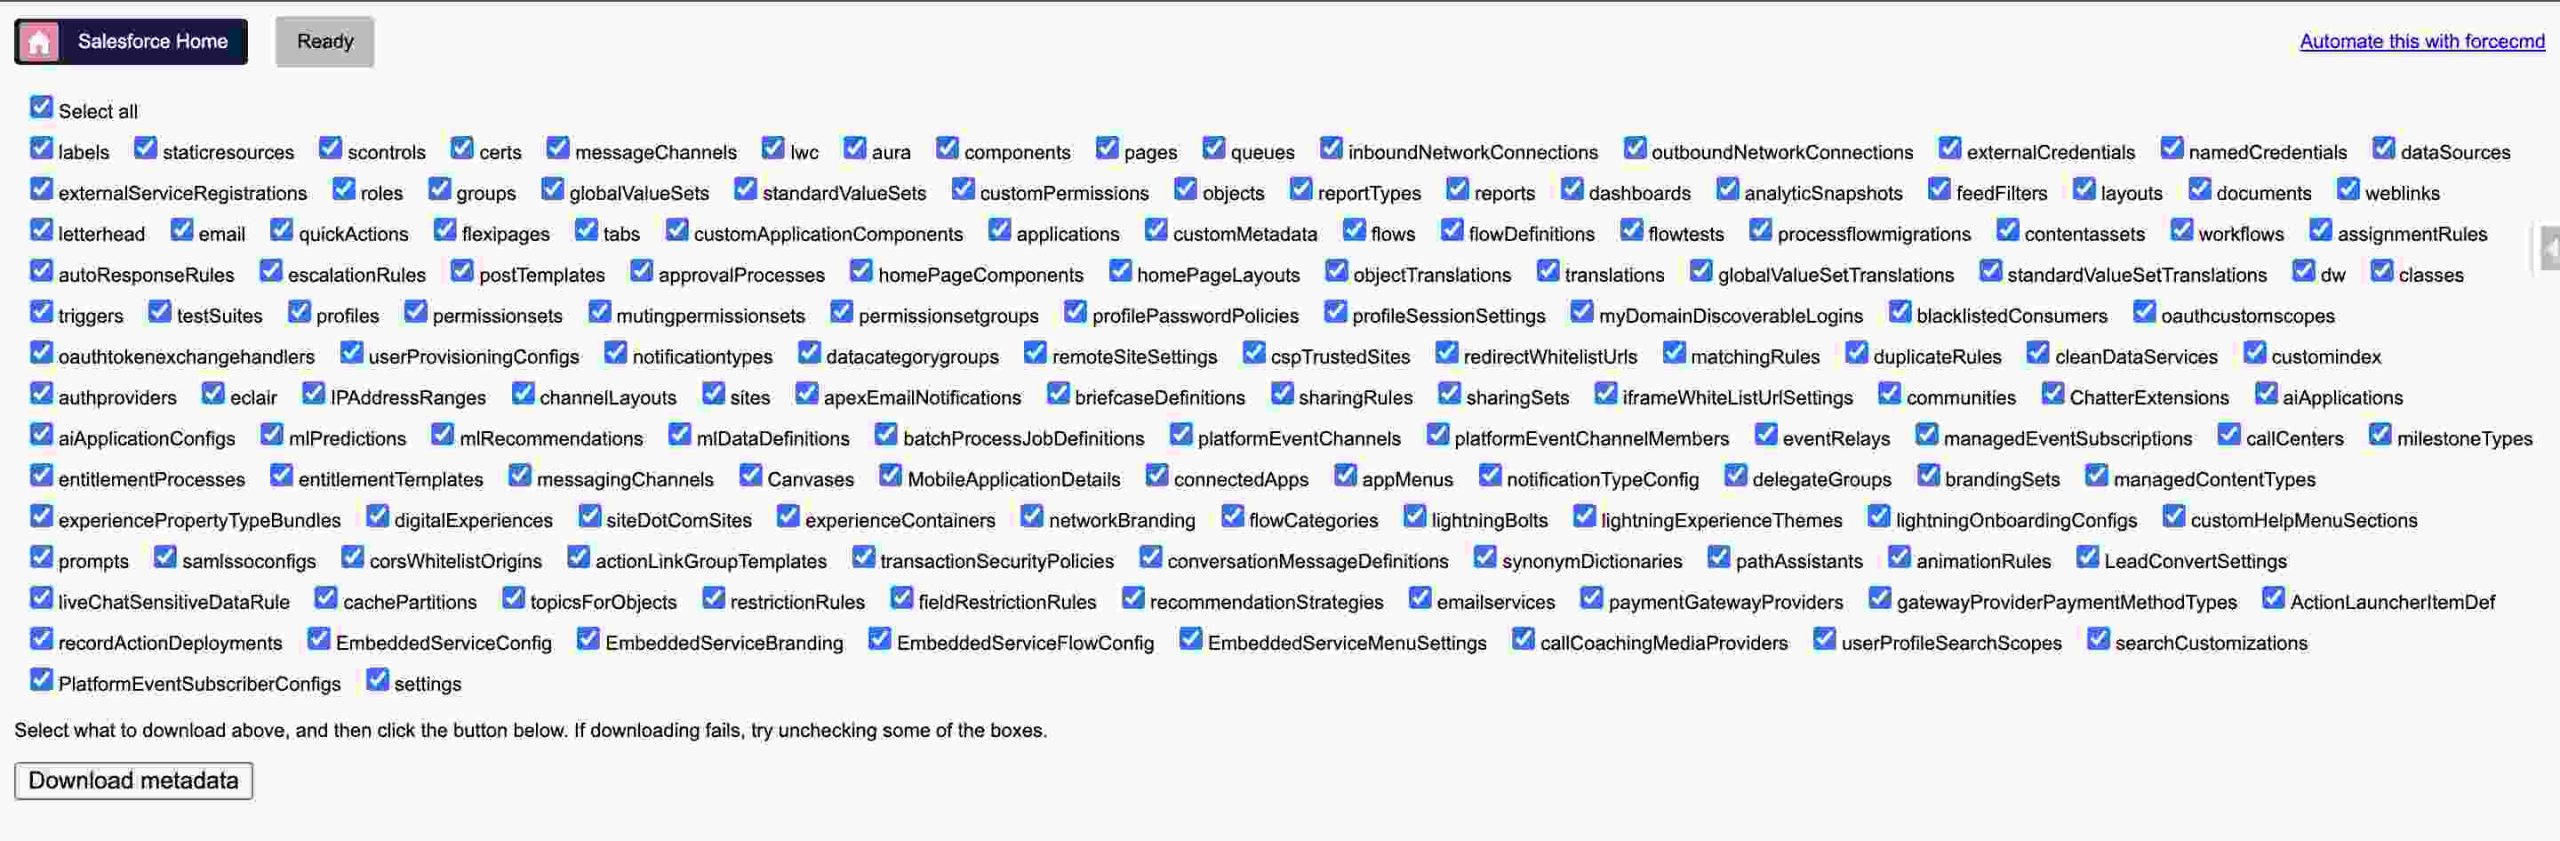
2. Metadata Inspection
With Salesforce Inspector Reloaded, you can see detailed information about the structure of your Salesforce objects. This is called metadata inspection.
How to Inspect Metadata:
- Open Salesforce Inspector: Click the icon.
- Go to the Metadata Tab: Select “Inspect Metadata”.
- Choose an Object: Select the object you want to inspect, like “Account”.
You’ll see detailed information about the object, including its fields, data types, and configurations. This is very helpful when you need to understand how an object is set up. This is very helpful when you need to understand how an object is set up. For more insights on metadata and triggers, check out our post on Apex Trigger Examples.
3. SOQL Query Execution
Salesforce Inspector Reloaded lets you run SOQL (Salesforce Object Query Language) queries directly in your browser. This is super handy for quickly finding data.
Running a Query:
- Open Salesforce Inspector: Click the extension icon.
- Go to the Query Tab: Select “Execute SOQL Query”.
- Write Your Query: Type your SOQL query in the text box.
- Click “Execute”: The results will appear below.
Here’s an example query to find all contacts with an email ending in “@example.com”:
SELECT Id, Name, Email FROM Contact WHERE Email LIKE '%@example.com'For those preparing for certifications, practicing SOQL queries can be very useful. Check out our guide on Salesforce Certification Questions and Answers to get more tips.
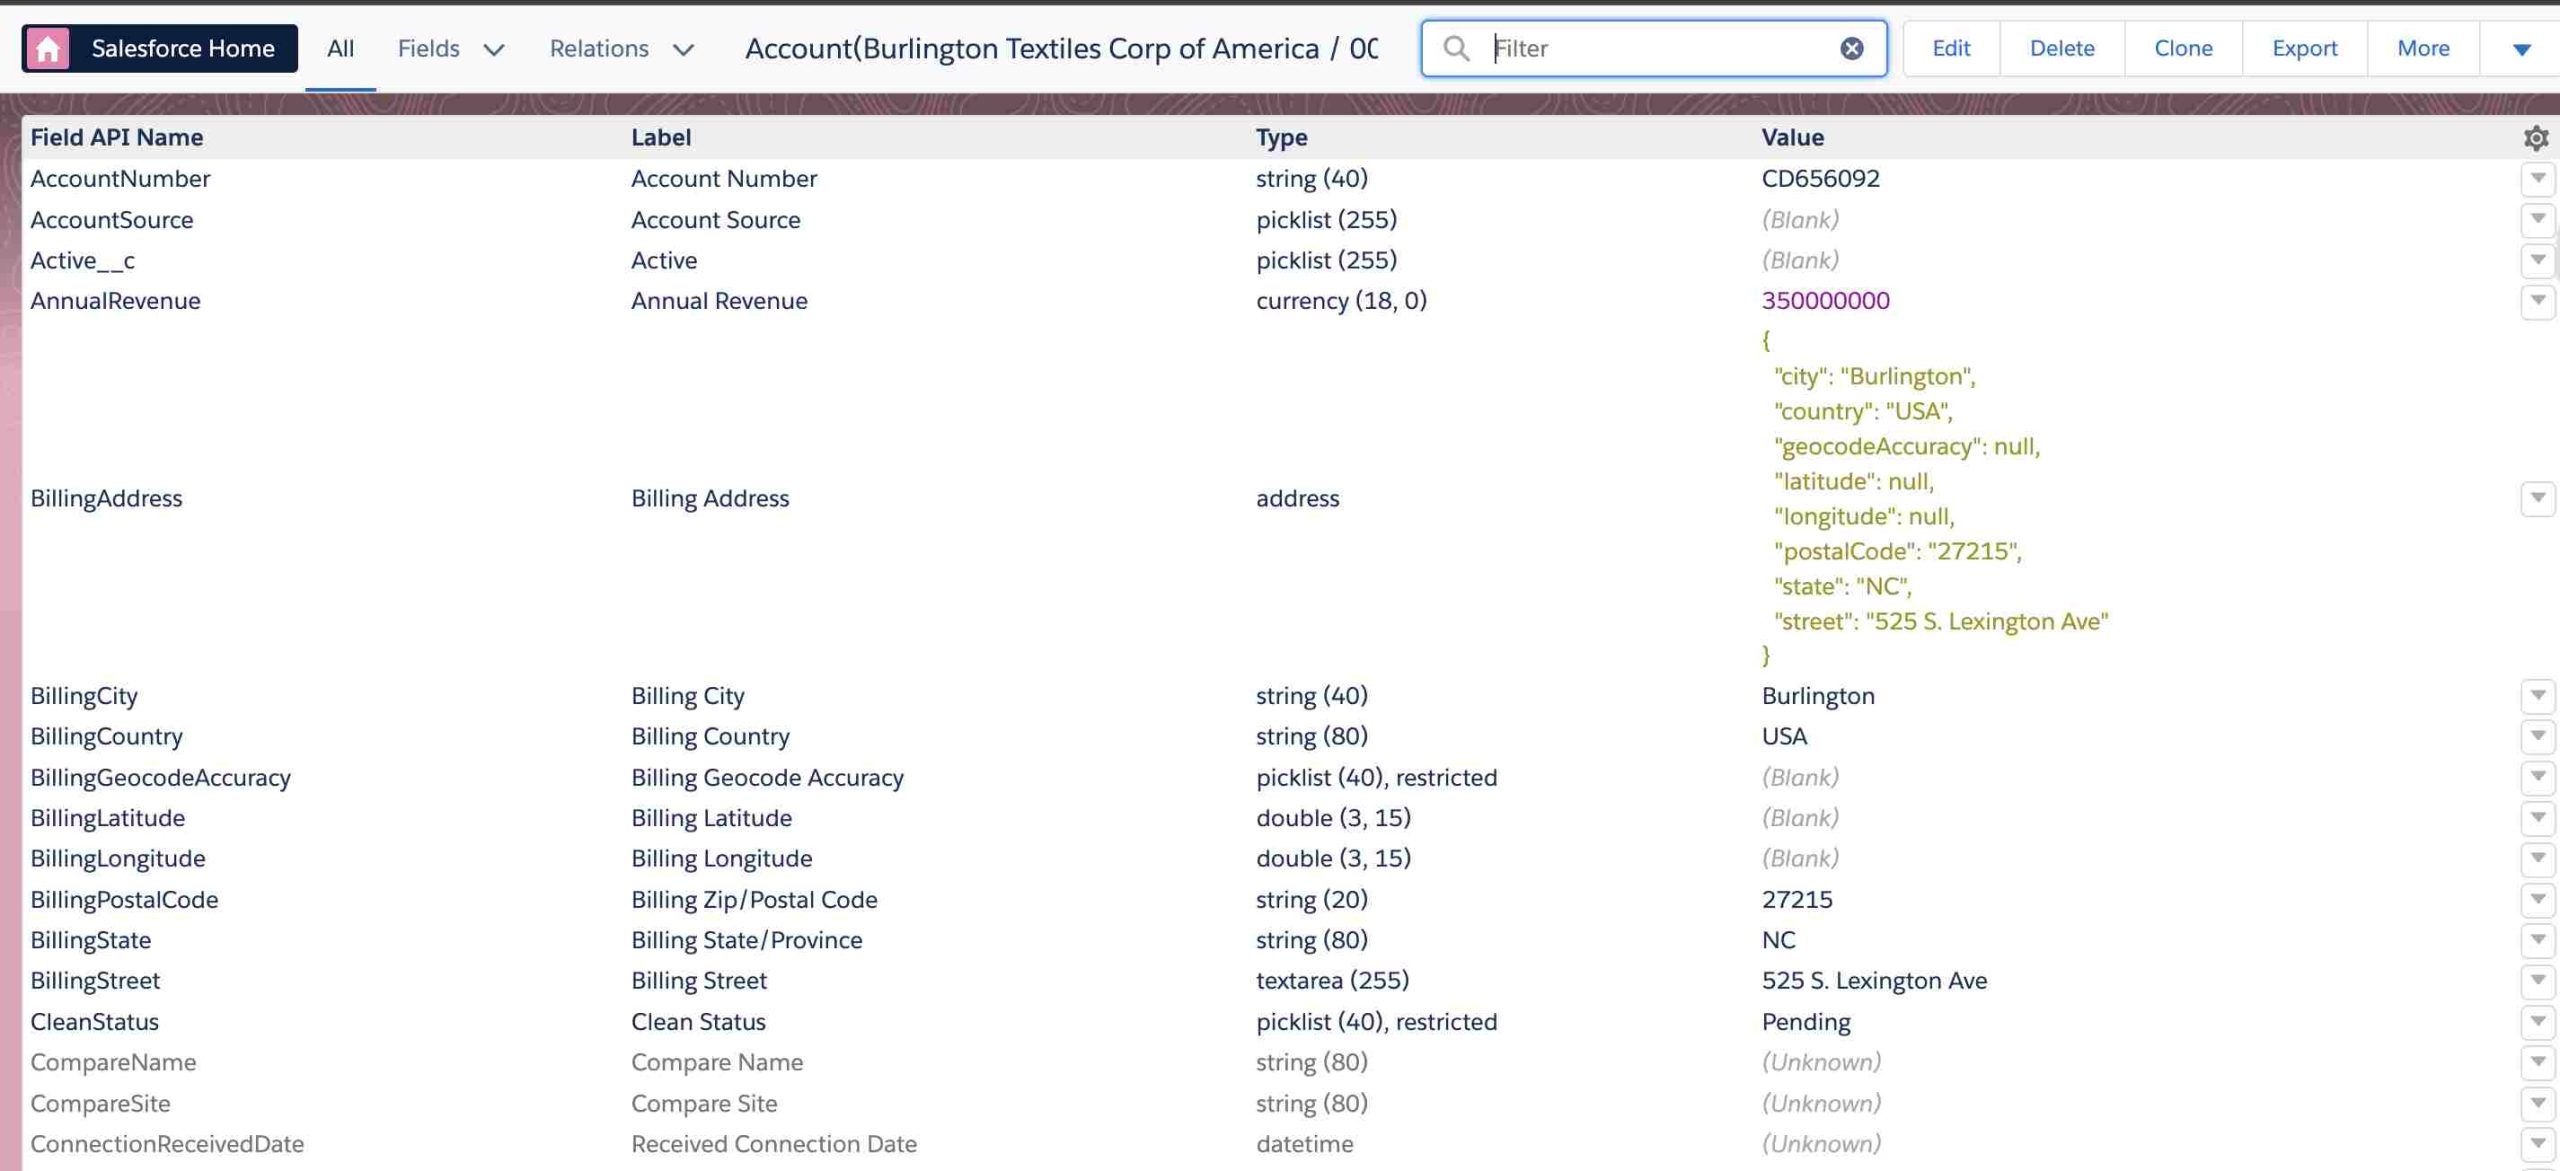
4. Field and Record Details
This feature gives you in-depth details about any field or record in Salesforce. Let’s see how it works:
Viewing Field Details:
- Open a Record in Salesforce: Go to any record, like an Account or Contact.
- Open Salesforce Inspector: Click the icon.
- Go to the Field Details Tab: You’ll see all the field information for that record.
You can see the value of each field, its data type, and other properties. This is great for troubleshooting and understanding your data better.
5. Debugging Tools
Debugging issues in Salesforce can be tough, but Salesforce Inspector Reloaded makes it easier with its built-in tools.
Using Debug Logs:
- Open Salesforce Inspector: Click the extension icon.
- Go to the Logs Tab: Here you can access debug logs.
- View and Analyze Logs: Look at the logs to find errors and issues.
Common errors you might see include:
- Error: Field value too large. Solution: Check the field length and data type.
- Error: Missing required field. Solution: Make sure all mandatory fields are filled.
By using Salesforce Inspector Reloaded, you can save a lot of time and make your work with Salesforce much more efficient. Try these features out and see how they can help you!
For advanced debugging techniques, you can refer to our post on Batch Apex.
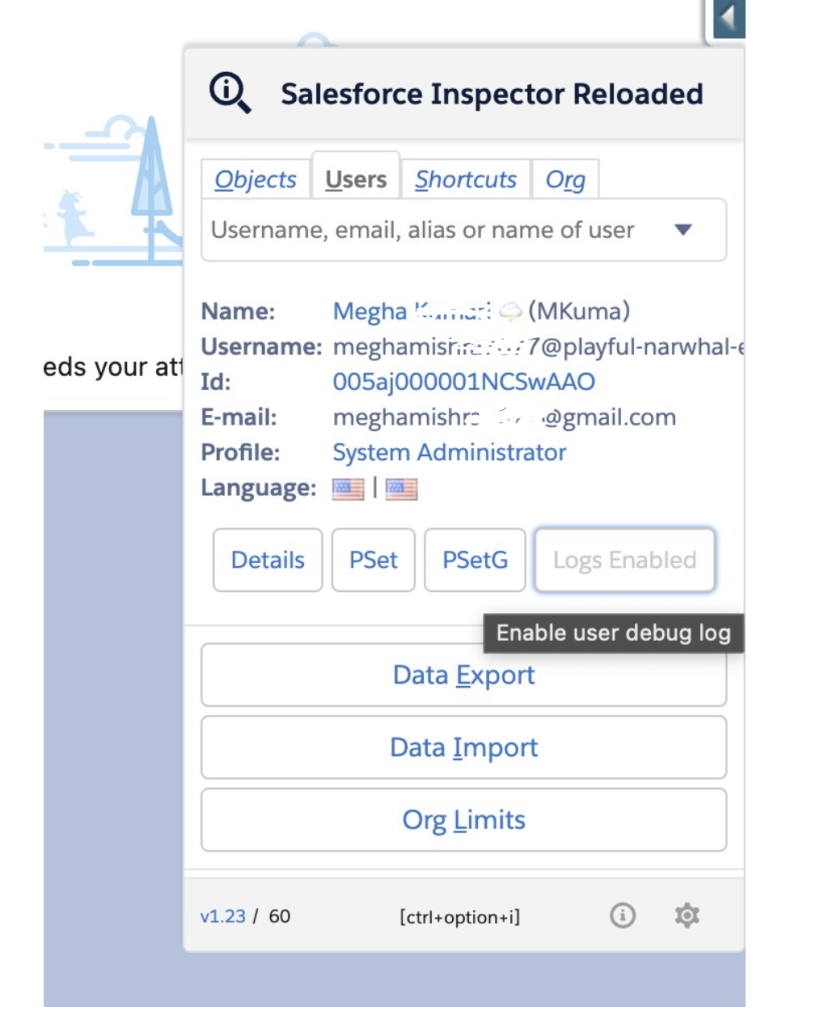
6. User Management
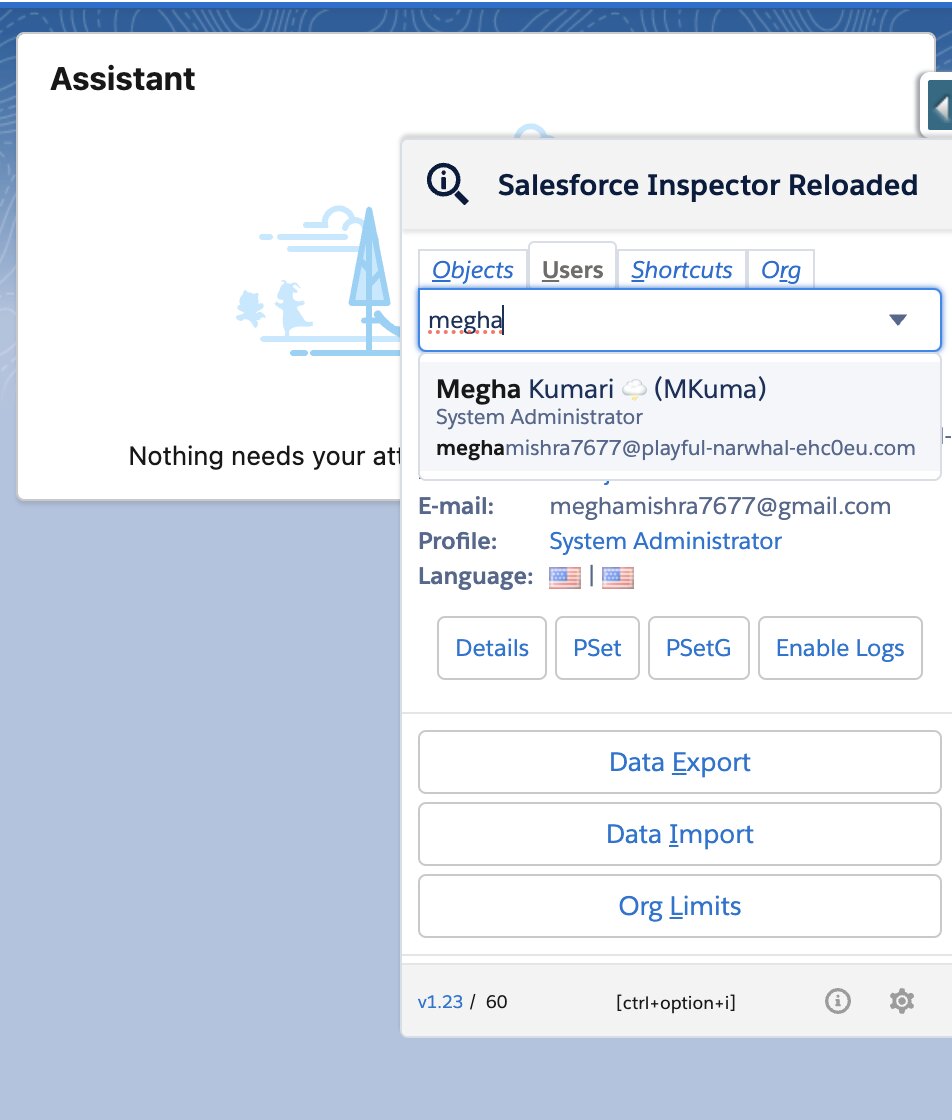
User Management in Salesforce Inspector Reloaded makes it incredibly easy to manage and troubleshoot user accounts. Whether you need to debug functionality or test features by logging in as another user, it can be done in just a few clicks.
Managing Users:
- Search for Users: You can search by username or email, making it simple to find the user you need.
- View Inactive Users: Salesforce Inspector even shows inactive users, marked with an inactive sign.
- User Details and Permissions: For both active and inactive users, you can view details, and permission sets, and perform actions related to permission set groups.
Logging in as Another User: Sometimes, you need to log in as another user to debug issues or test features. With Salesforce Inspector Reloaded, this is straightforward:
- Open Salesforce Inspector: Click the extension icon.
- Go to the User Management Tab: Search for the user by username or email.
- Log In as User: Click the option to log in as the selected user.
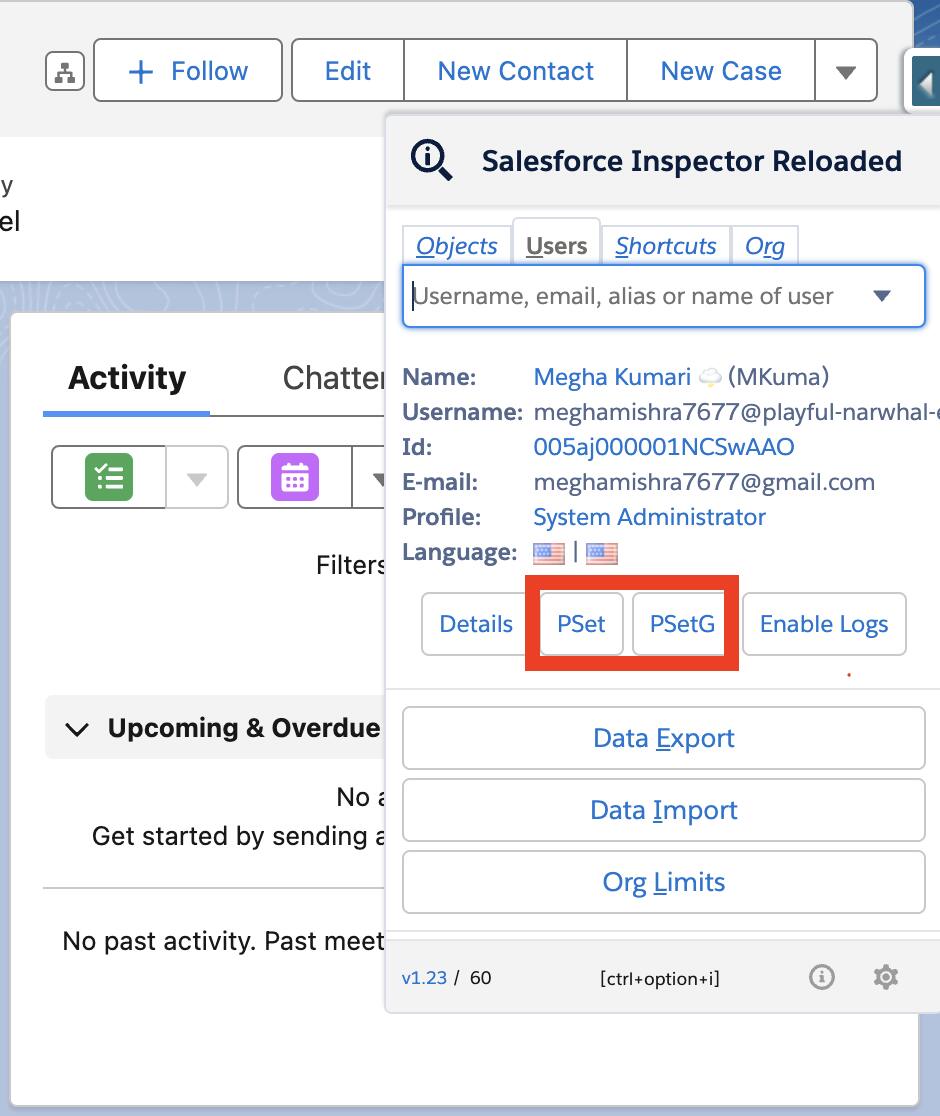
Managing Permission Sets: Instead of navigating through the setup to manage permission sets, Salesforce Inspector Reloaded allows you to directly add or modify permission sets and permission set groups:
- Select User: Search for and select the user you want to manage.
- Add Permission Sets: Directly add the respective permission sets without navigating away from the User Management tab.
- Save Changes: Apply the changes immediately.
This feature is especially useful for managing large numbers of users and ensuring everyone has the correct permissions quickly and efficiently.
Conclusion
Congratulations! You’ve now learned about Salesforce Inspector Reloaded and how to install this fantastic Chrome extension. We’ve covered the basics of what Salesforce Inspector is and why it’s such an invaluable tool for Salesforce admins and developers. Salesforce Inspector Reloaded is more than just a tool, it’s a game-changer for anyone working with Salesforce. Streamlining your workflows and providing quick access to critical data and metadata, allows you to focus more on what matters most—solving problems and delivering value.
If you haven’t installed it yet, go ahead and give it a try. You’ll quickly see how it can transform your day-to-day tasks and make your Salesforce experience smoother and more productive.
Thank you for joining me on this journey through Salesforce Inspector Reloaded. I hope you found this guide helpful and that it inspires you to explore all the incredible features of this tool. Happy Salesforce-ing!