Hey everyone, I’m Megha, and I’m thrilled to have you here on my blog, Salesforce Megha. Today, we’re going to explore something exciting within the Omnistudio Salesforce ecosystem. Whether you’re a seasoned Salesforce pro or just starting, this post is for you. So, let’s dive right in!
Salesforce is a powerful platform that helps businesses manage their customer relationships. But sometimes, creating a smooth and engaging user experience can be tricky. That’s where Omnistudio comes in. It’s like a toolbox filled with awesome tools that make it easier to build and manage applications on Salesforce. It helps make complex tasks simple, making both the developers’ and users’ lives much easier.
Table of Contents
Importance of Omnistudio in the Salesforce Ecosystem
Why is Omnistudio so important? Well, it helps businesses create dynamic, data-driven experiences without needing a lot of custom code. This means you can create apps faster and with fewer headaches. It’s a game-changer for anyone looking to make their Salesforce apps more efficient and user-friendly.
What is Omnistudio?
Omnistudio is a set of tools and services in Salesforce designed to help you create amazing user experiences. Imagine having a magic toolbox that lets you build cool apps quickly and easily. That’s Omnistudio for you! It lets you pull in data from different places, create guided processes, and display information in a user-friendly way.
Overview of Its Components
Omnistudio is made up of several key components:
- FlexCards: These are like mini-widgets that neatly show important information. You can think of them as little cards that can be placed on a page to show data.
- OmniScripts: These are guided steps that help users complete tasks. Imagine you’re filling out a form online, and it guides you through each step. That’s what OmniScripts does.
- Integration Procedures: These are behind-the-scenes helpers that get data from different sources, transform it, and save it where needed without you having to do it manually.
- DataRaptors: These tools help you extract, transform, and load data. They’re like little data helpers that make sure the right data gets to the right place.
- OmniAnalytics: This tool helps you track how well your Omnistudio components are performing. It’s like having a report card that shows you how your apps are doing.
Let’s break down each of these components in more detail.
Steps to Install a Package of Omnistudio
Getting Omnistudio set up in your Salesforce environment is easy if you follow these steps. Let’s go through the process together.
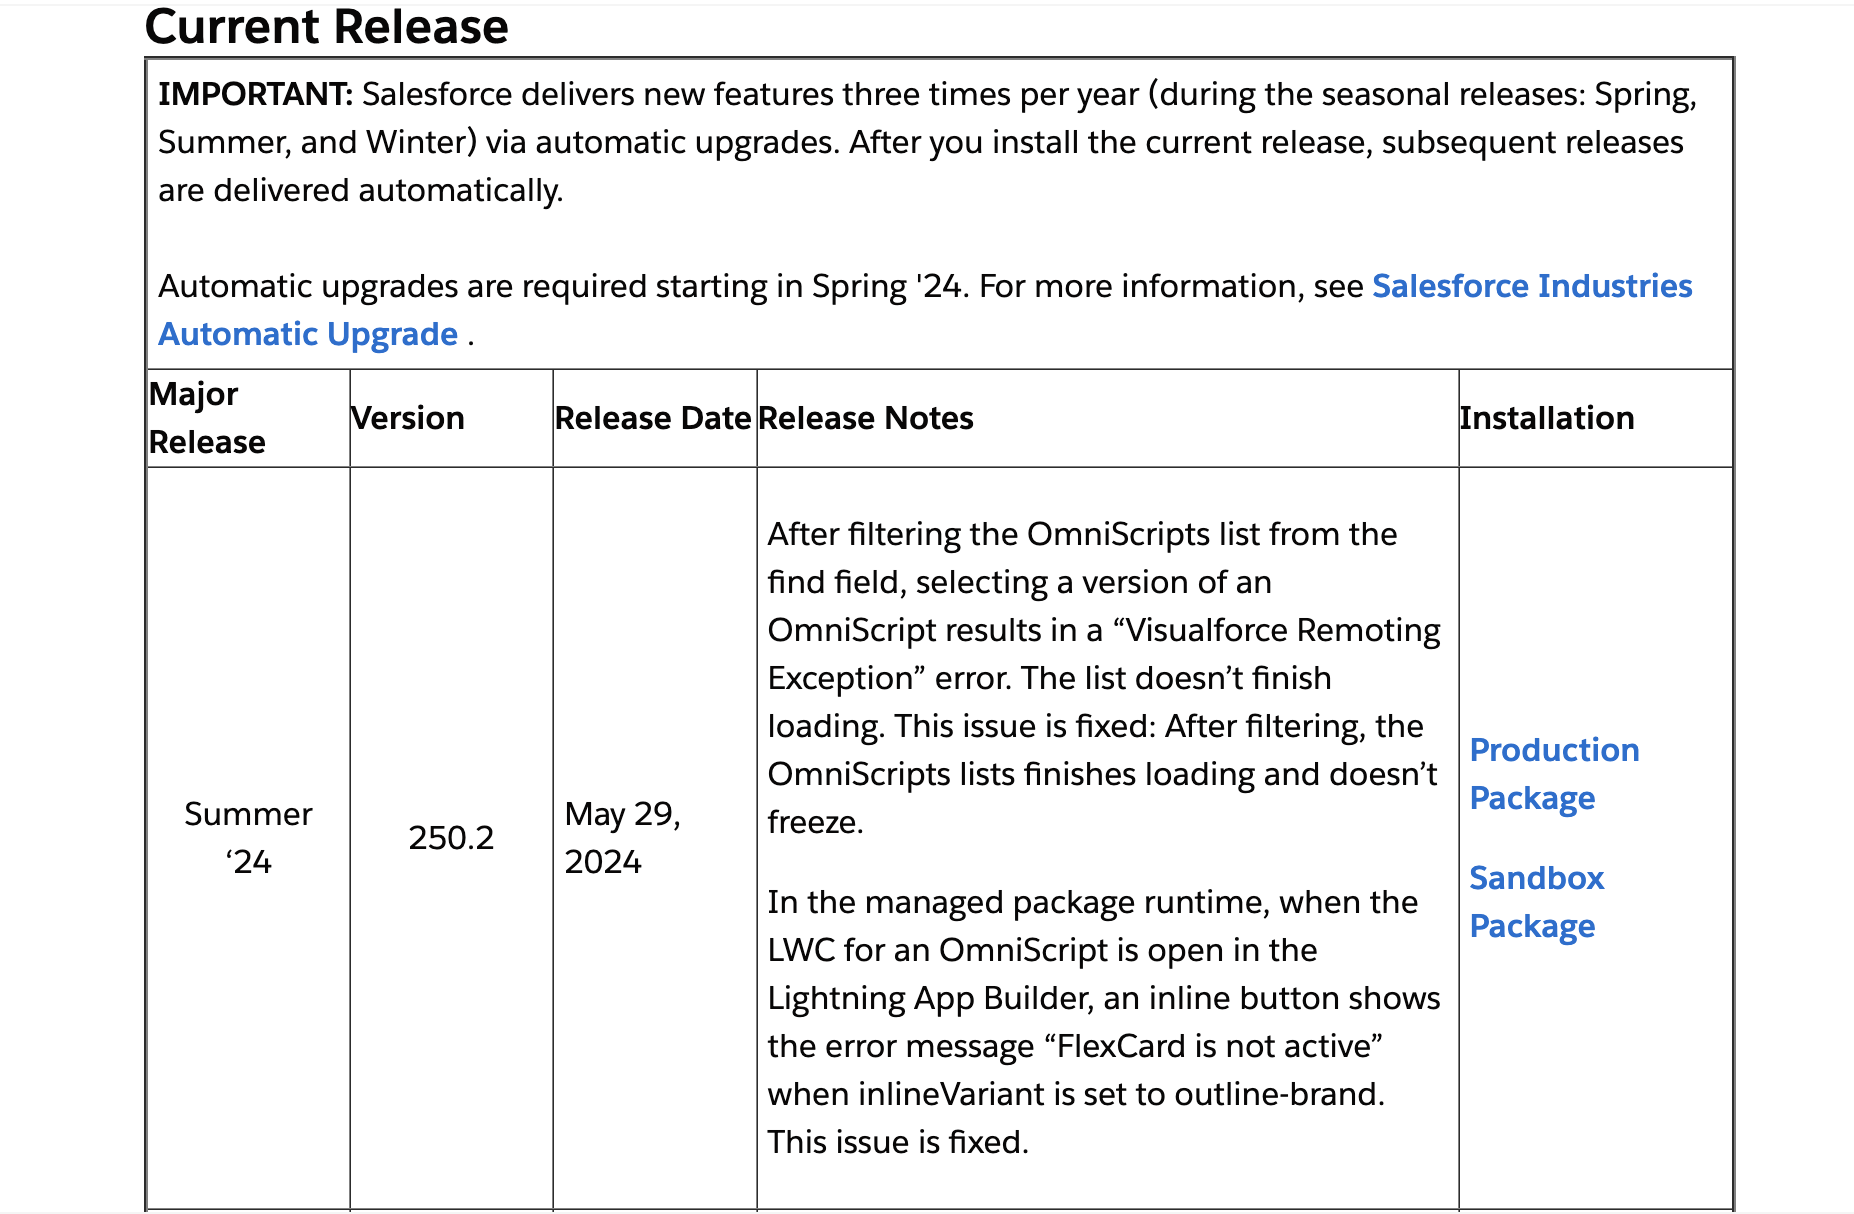
Access the Installation Link
First, you need to access the installation link for Omnistudio. You can do this by visiting this Salesforce help article.
Choose the Installation Option
On the page, you will see different options for installation. You can choose between:
- Package Installation URLs
- Production Package
- Sandbox Package
Pick the one that suits your needs. If you’re just testing things out, go with the Sandbox Package. If you’re ready to use it in your live environment, choose the Production Package.
Log In to Salesforce
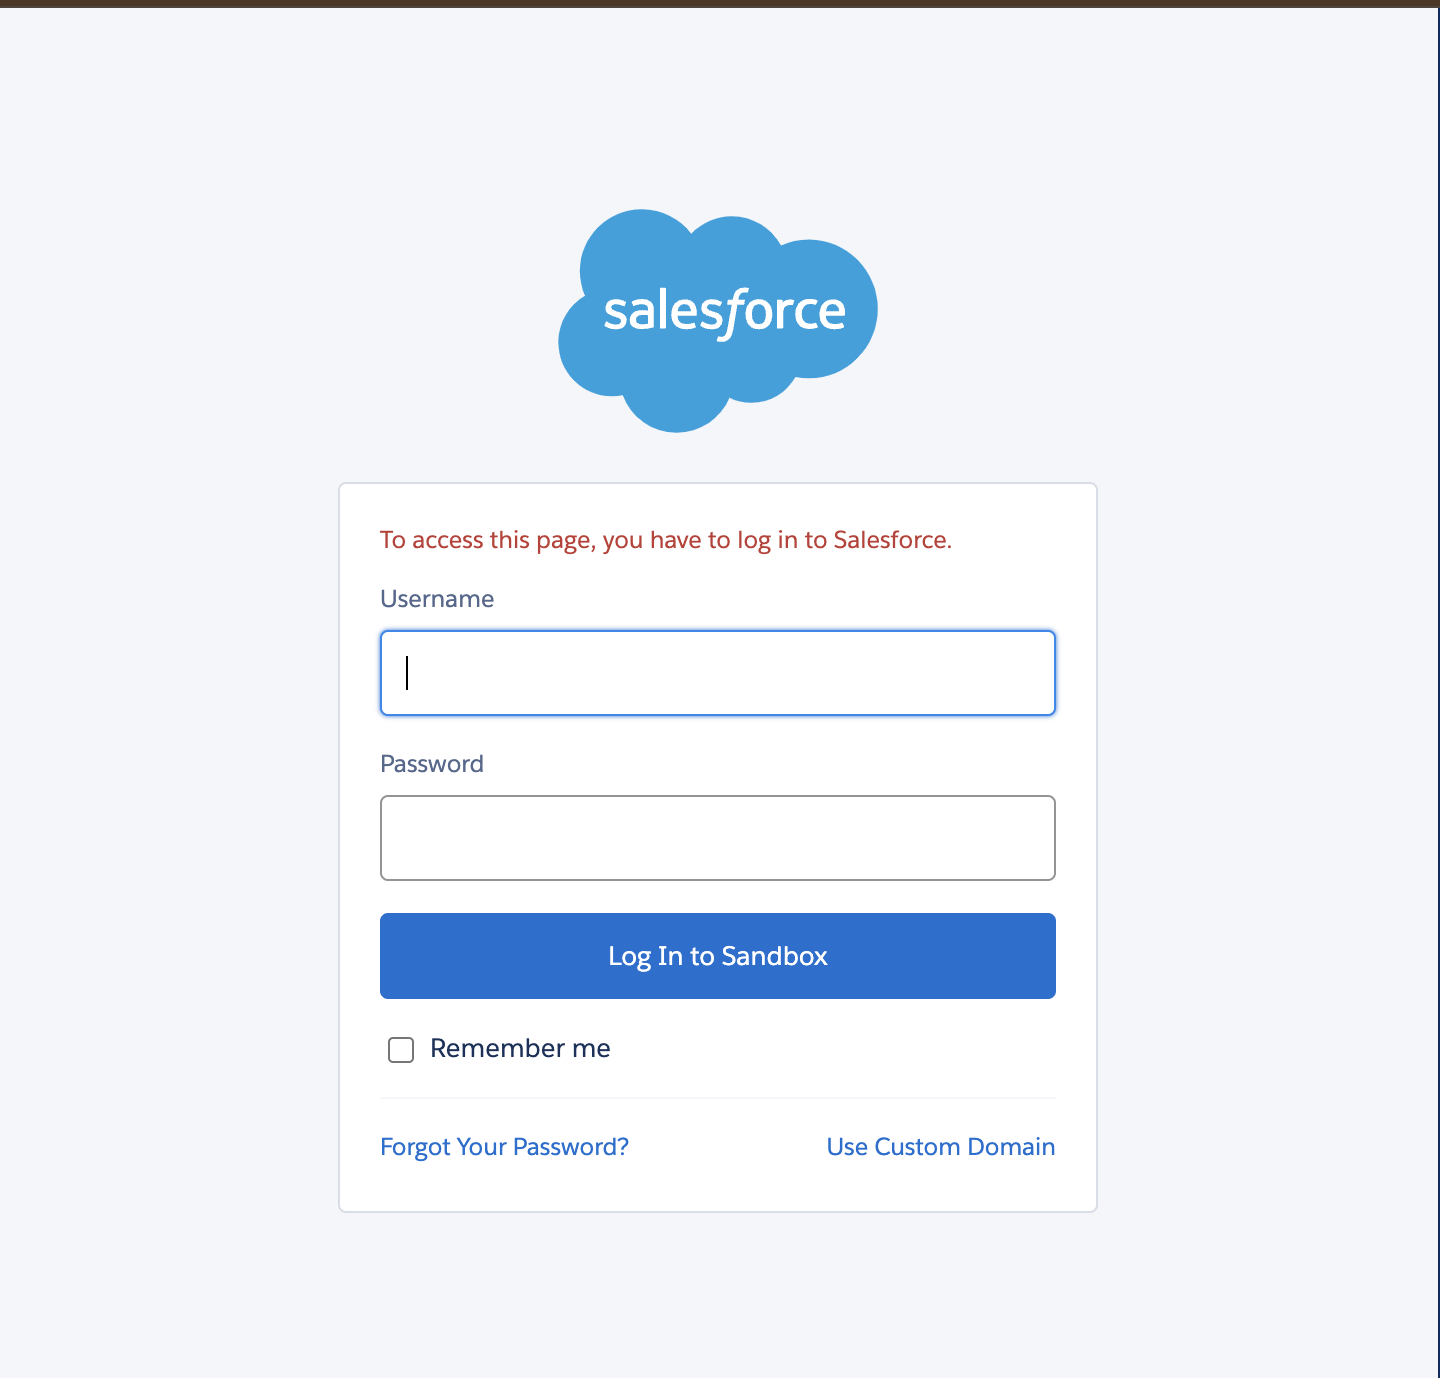
- Click on the chosen package link. This will take you to the Salesforce login page.
- Enter your Salesforce credentials (your username and password) to log in.
Select Users for Access
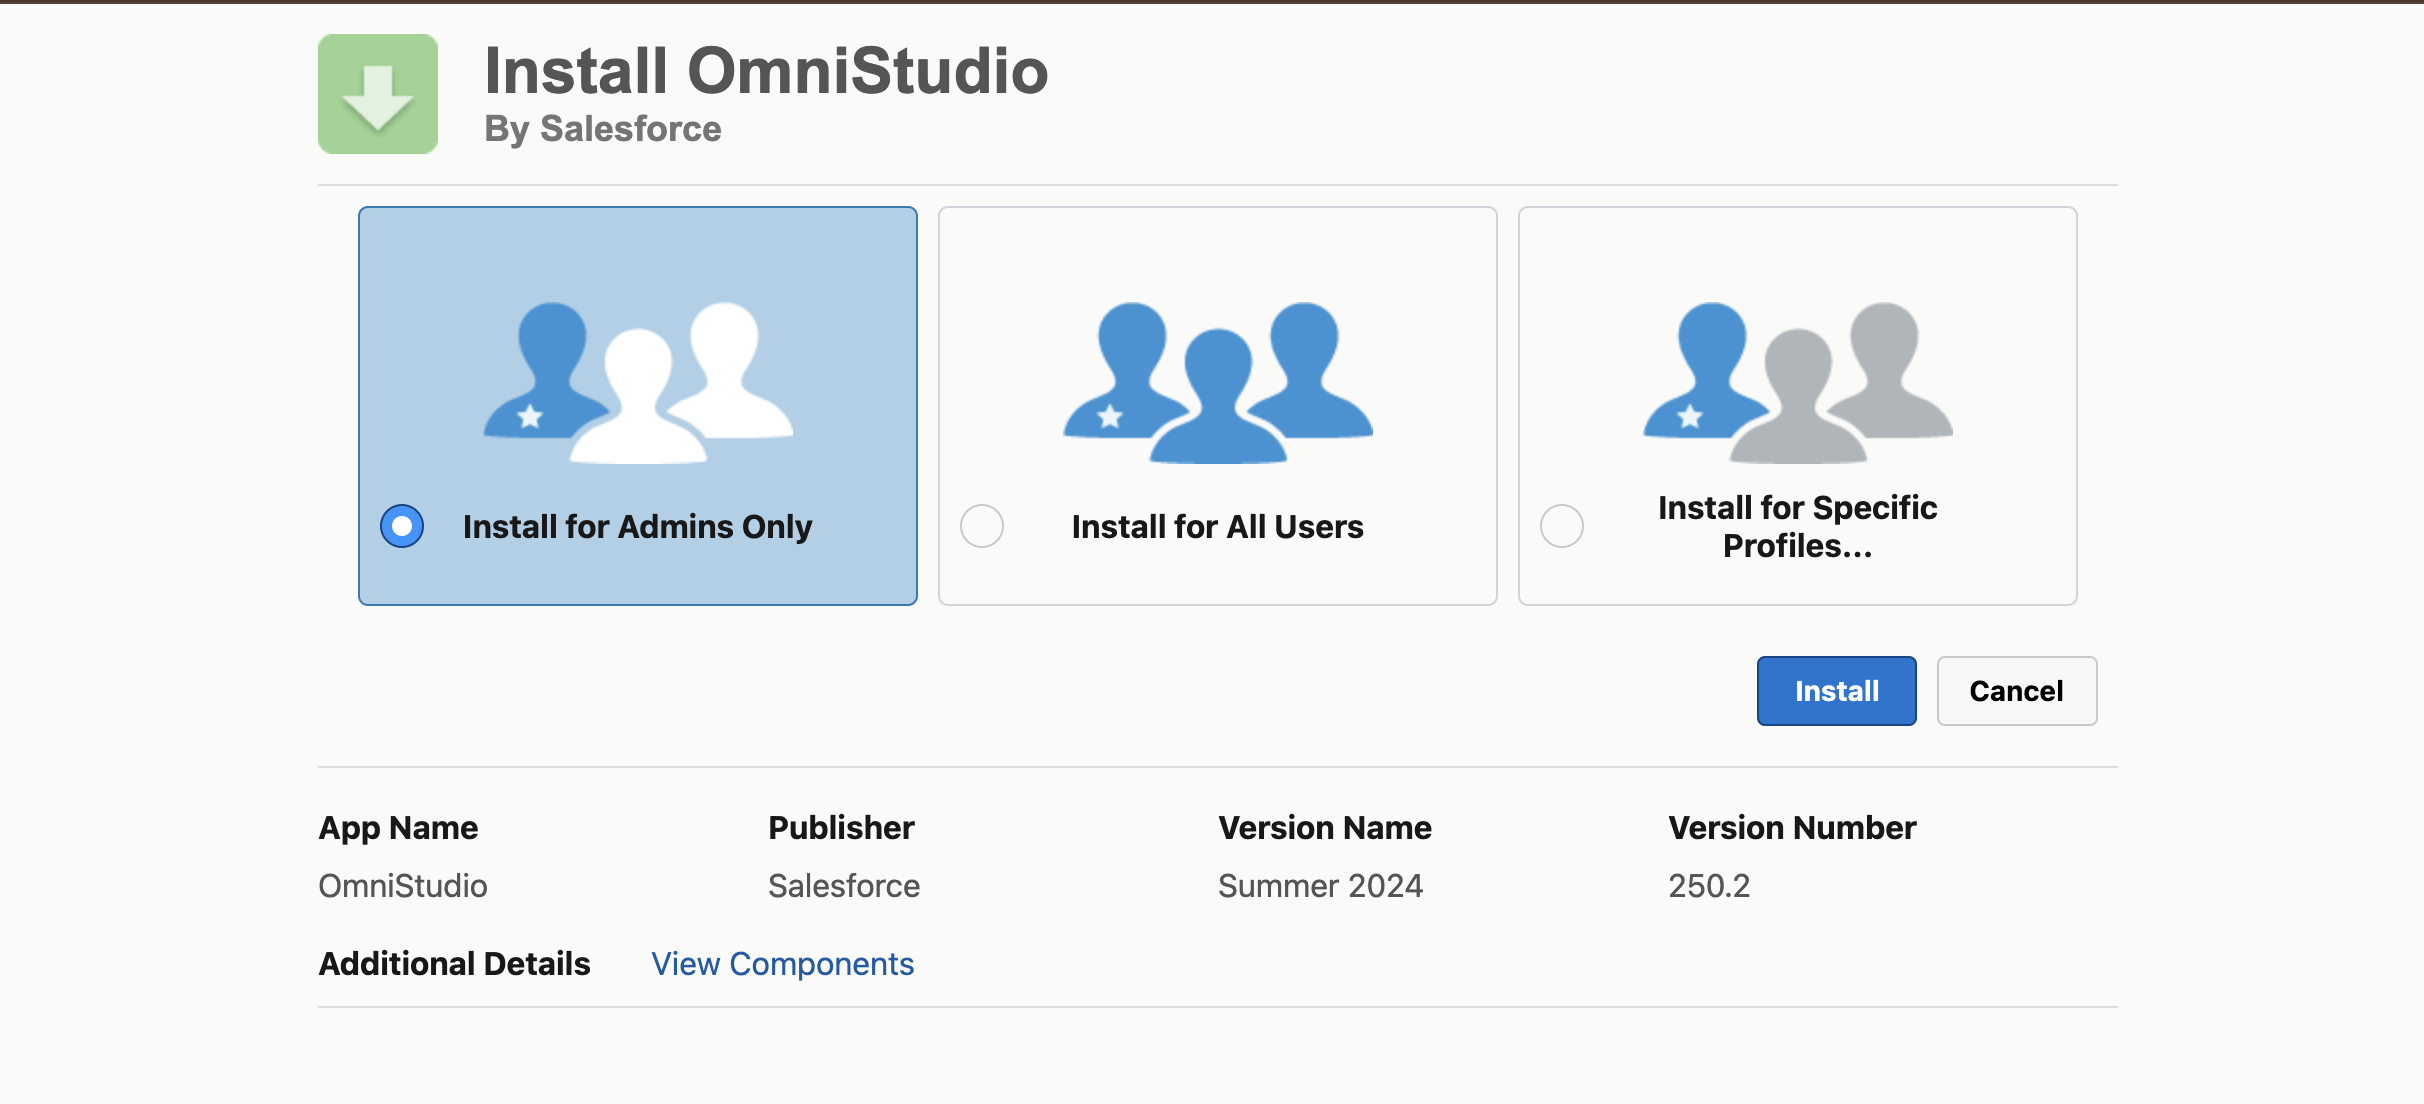
After logging in, you’ll see a page asking you to select the users who should have access to Omnistudio. You can choose to:
- Install for Admins Only
- Install for All Users
- Install for Specific Profiles
Select the option that best fits your needs.
Hit the Install Button
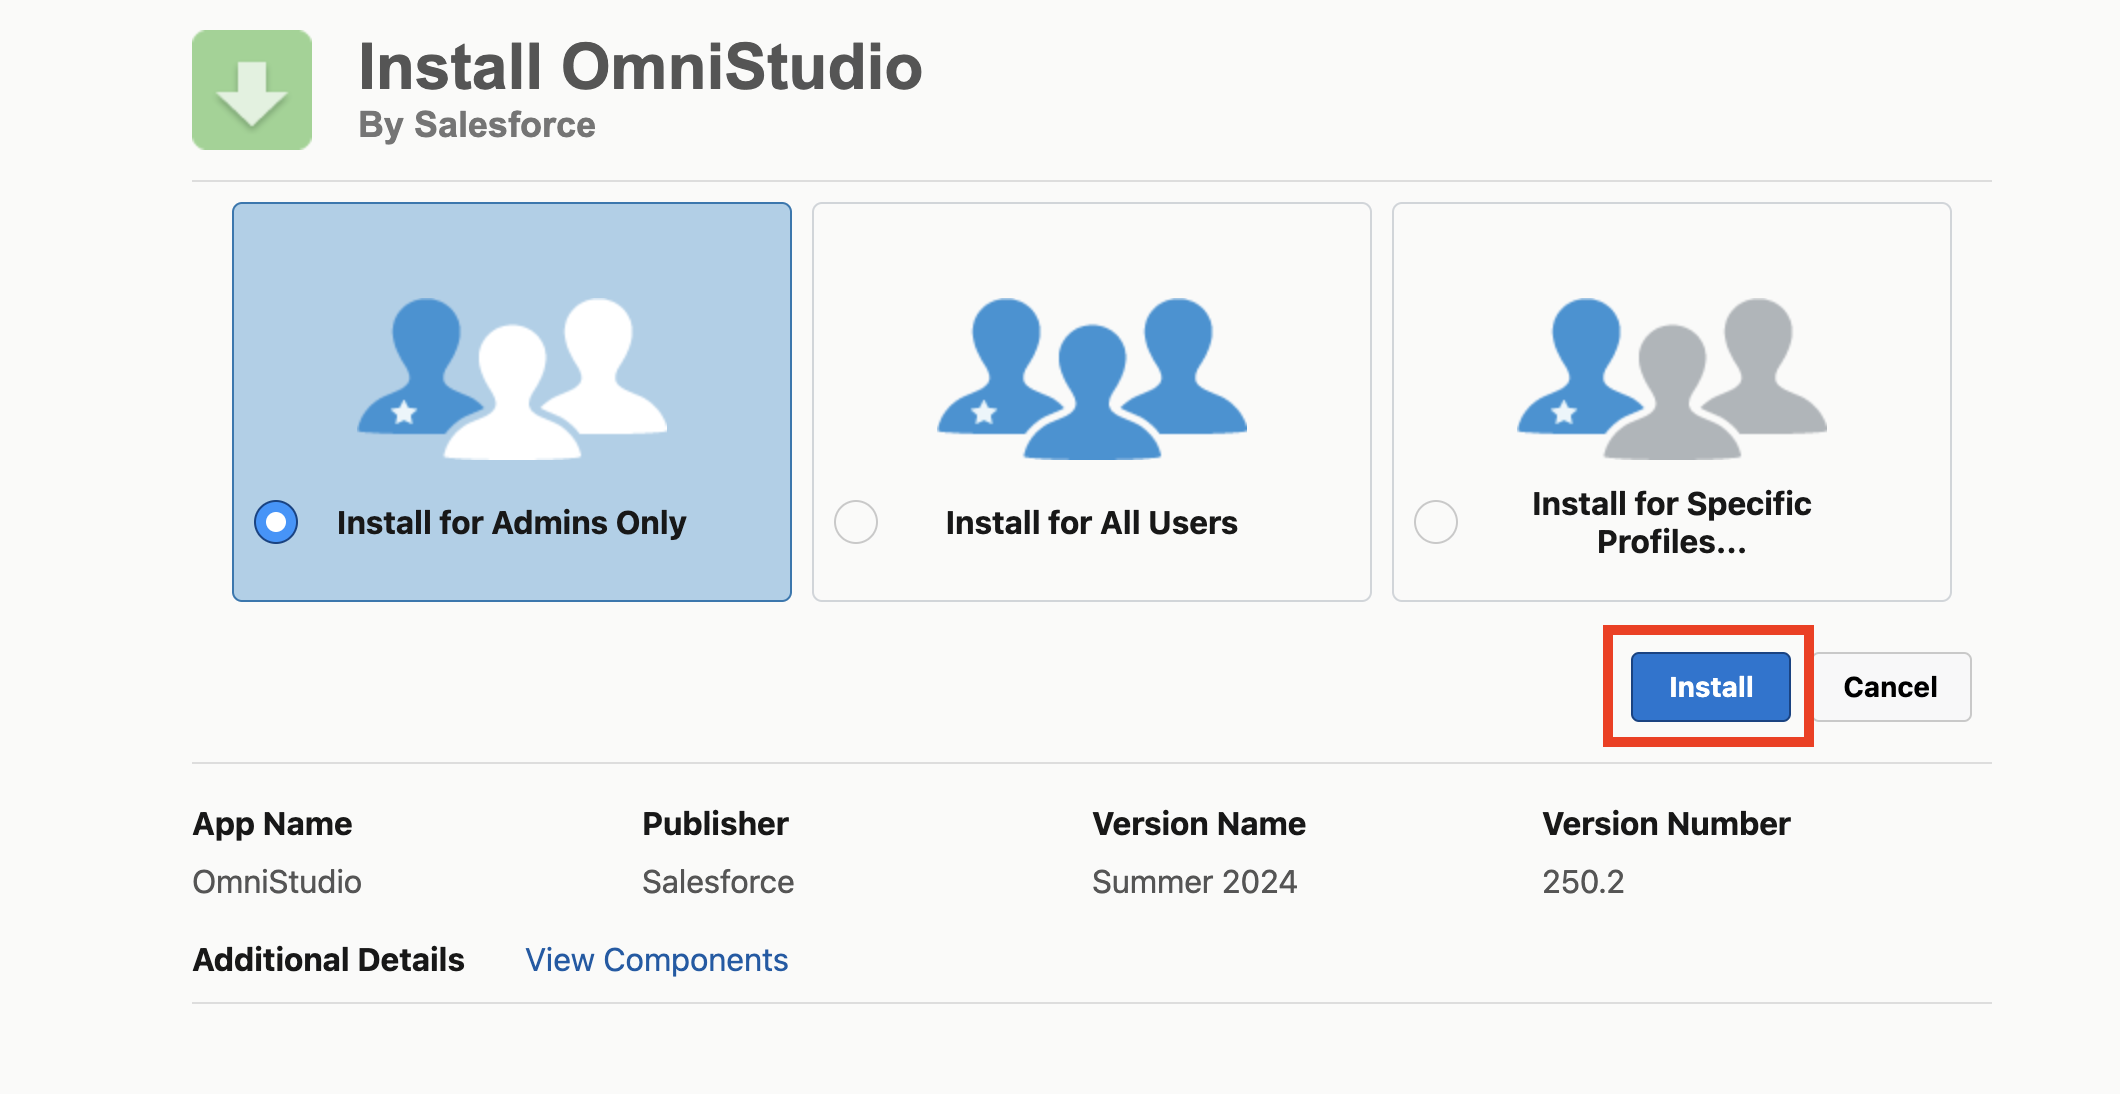
Once you’ve chosen the users who need access, click the Install button.
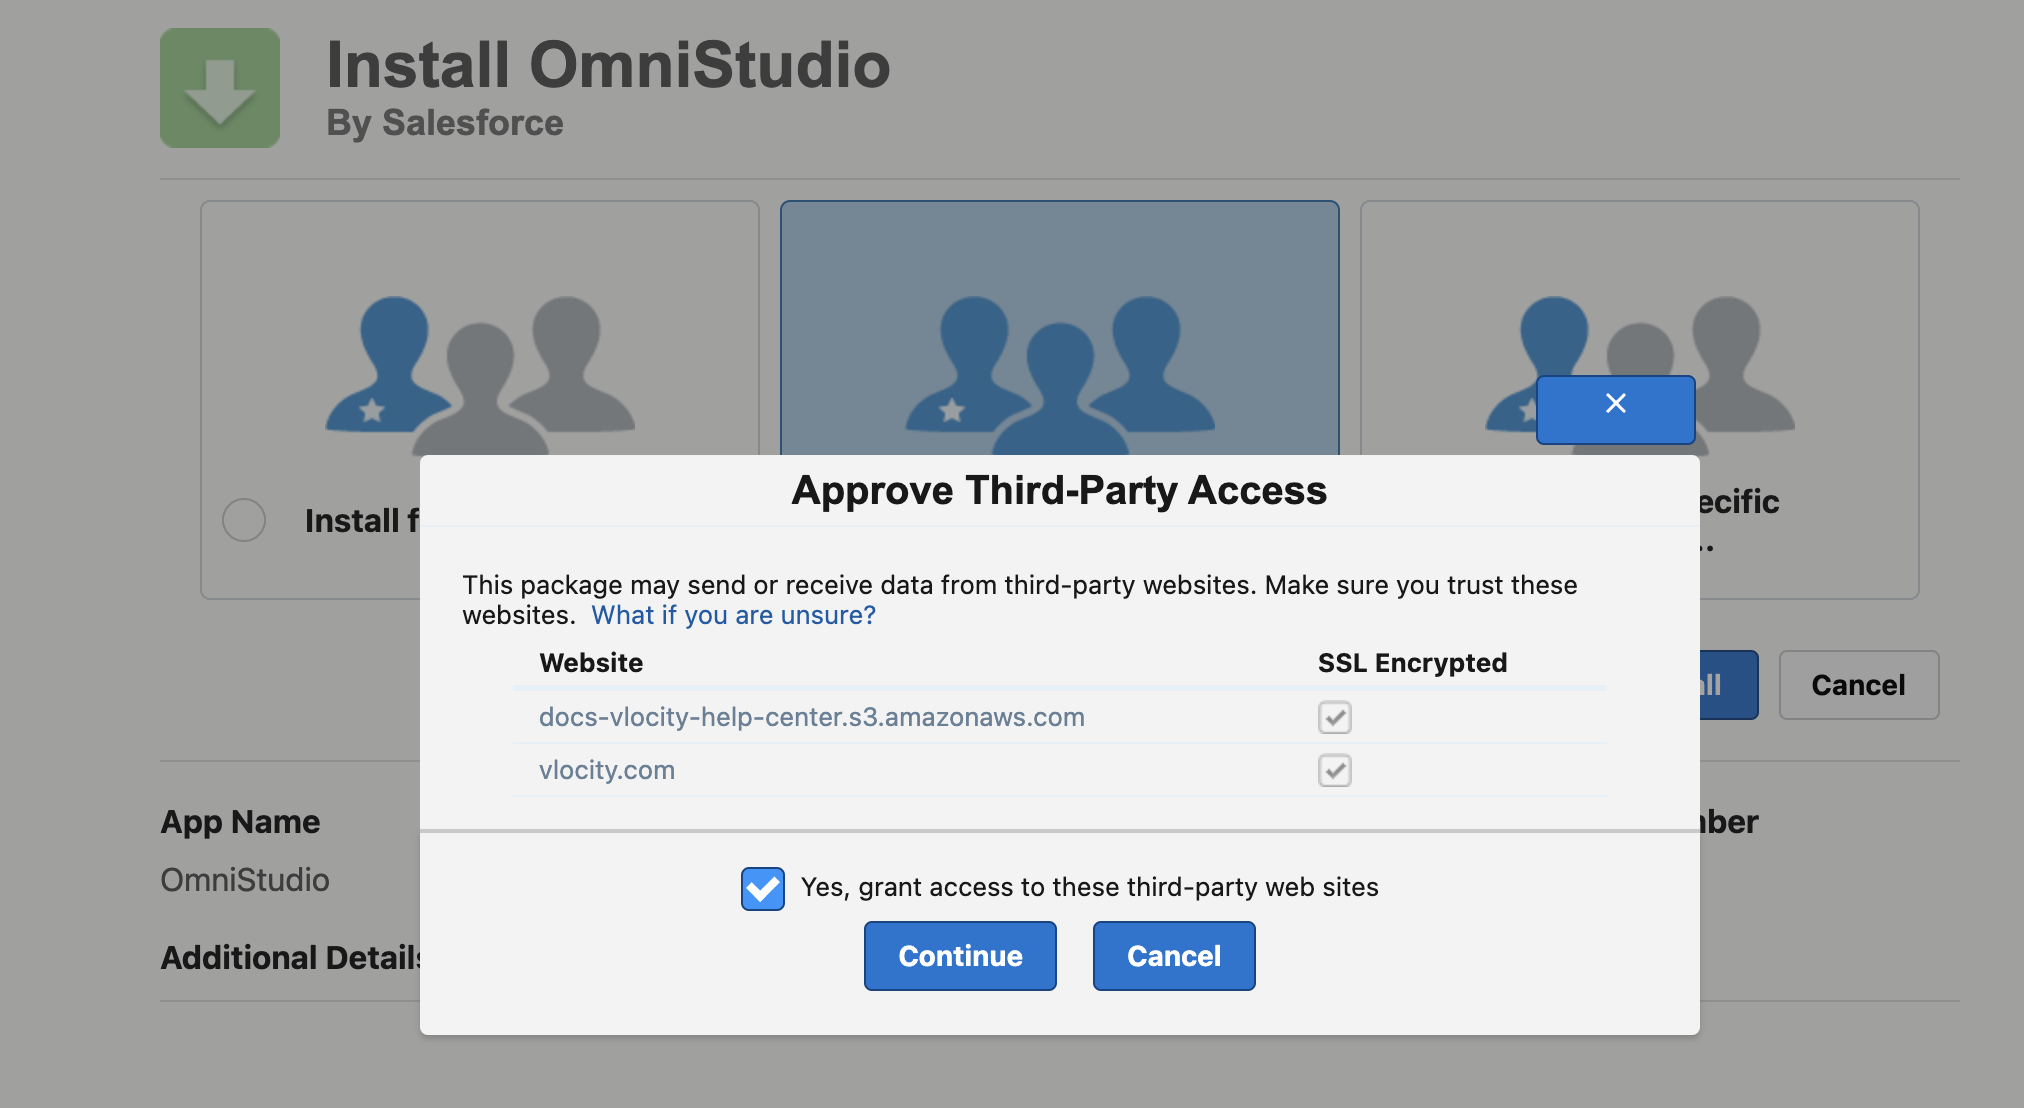
Approve Third-Party Access
A pop-up will appear asking you to approve third-party access. Select both options to allow the necessary permissions and click Continue.
Complete the Installation
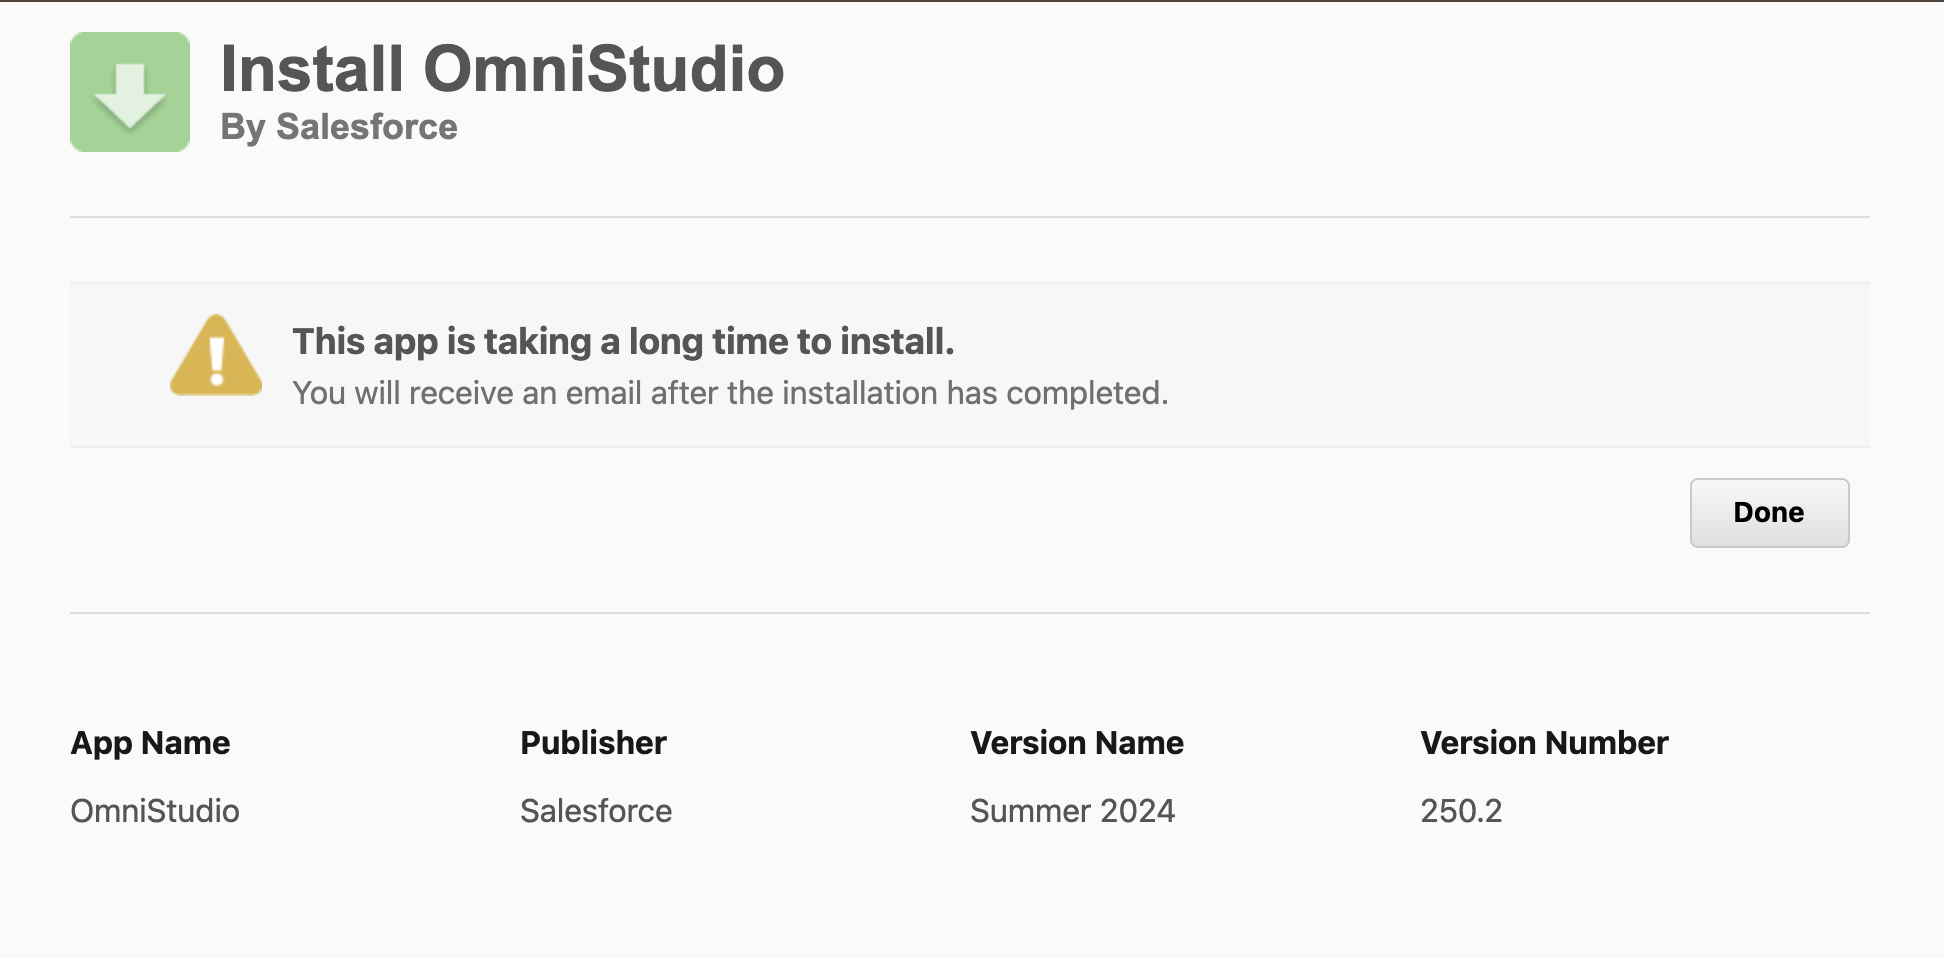
- Wait for the installation to complete. This might take a few minutes.
- Once done, you’ll see a message saying the installation is complete. Click Done.
Review the Installed Package
Now, you can review the installed package in your Salesforce Org. To do this, go to Setup, then Installed Packages, and you should see Omnistudio listed there.
By following these steps, you’ll have Omnistudio installed and ready to use in your Salesforce environment. If you have any questions or run into any issues, feel free to leave a comment below!’
Developer Org
If you want to get a developer org of Omnistudio directly, you can sign up using this link. This is a great way to practice and get familiar with Omnistudio features in a safe, test environment.
Note: We also have a detailed guide on how to create a free Salesforce developer org, which can be very helpful if you’re new to the process.
Components of Omnistudio
FlexCards
FlexCards are like little info cards that show important information on a page. Imagine having a business card that tells you all about a person, but it’s digital and can show any kind of data. You can put FlexCards on different parts of a Salesforce page to show important data in a neat and easy-to-read way.
Key Features and Benefits
- User-Friendly: FlexCards are easy to create and customize. You don’t need to be a coding expert to make them look good.
- Interactive: They can include buttons and actions, so users can interact with them directly.
- Efficient: FlexCards display data from multiple sources in one place, making it easier for users to find what they need quickly.
Example of a FlexCard
Let’s say you want to show a customer’s contact information on a Salesforce page. Here’s a simple FlexCard:
<template>
    <div class="slds-box">
        <div class="slds-text-heading_medium">Contact Information</div>
        <div>Name: {customer.Name}</div>
        <div>Email: {customer.Email}</div>
        <div>Phone: {customer.Phone}</div>
    </div>
</template>
<script>
    import { LightningElement, api } from 'lwc';
    export default class ContactInfoCard extends LightningElement {
        @api customer;
    }
</script>
FlexCards can be used in various scenarios, like:
- Customer Service: Showing customer information on a service dashboard.
- Sales: Displaying order details in a sales portal.
- Management: Presenting key metrics on an executive summary page.
OmniScripts
OmniScripts guide users through processes step by step. Think of it as a helpful guide that takes users through each step of a form or process, ensuring they complete everything correctly. It’s like having a GPS for completing tasks in Salesforce.
Creating an OmniScript involves:
- Designing the Steps: Plan out each step the user needs to take.
- Configuring the Actions: Set up the actions for each step, like saving data or moving to the next step.
- Testing: Make sure everything works smoothly.
Imagine creating a new customer profile. Here’s a simple example:
{
    "Type": "Step",
    "Name": "CustomerDetails",
    "Elements": [
        {
            "Type": "Text",
            "Name": "CustomerName",
            "Label": "Name"
        },
        {
            "Type": "Email",
            "Name": "CustomerEmail",
            "Label": "Email"
        },
        {
            "Type": "Phone",
            "Name": "CustomerPhone",
            "Label": "Phone"
        }
    ]
}
Use Cases in Various Industries
- Healthcare: Guiding patients through appointment booking.
- Finance: Helping customers apply for loans.
- Retail: Assisting users in placing orders.
Integration Procedures
Integration Procedures are server-side processes that fetch, transform, and save data. They work behind the scenes to make sure your apps get the data they need quickly and efficiently. It’s like having a robot assistant that does all the data work for you.
Integration Procedures can be called from OmniScripts, FlexCards, or even other Integration Procedures. They are designed to handle complex data operations without slowing down the user interface.
Fetching customer data from an external system:
{
    "Type": "IntegrationProcedure",
    "Name": "FetchCustomerData",
    "Steps": [
        {
            "Type": "HttpAction",
            "Name": "GetCustomer",
            "HTTPMethod": "GET",
            "URL": "https://api.example.com/customers/{CustomerId}",
            "ResponseMapping": {
                "customer.Name": "Name",
                "customer.Email": "Email",
                "customer.Phone": "Phone"
            }
        }
    ]
}
DataRaptors
DataRaptors are tools that help you extract, transform, and load data within Salesforce. They ensure the right data is available at the right time and in the right format.
Different Types
- Extract: Pull data from Salesforce.
- Transform: Change data into the format you need.
- Load: Save data back into Salesforce.
Practical Applications and Benefits
- Extract: Get customer details for a report.
- Transform: Format data before displaying it on a FlexCard.
- Load: Save user input from an OmniScript.
Example of a DataRaptor Extract
{
    "Type": "Extract",
    "Name": "CustomerDataExtract",
    "SourceObject": "Customer__c",
    "Fields": [
        "Name",
        "Email",
        "Phone"
    ]
}
OmniAnalytics
OmniAnalytics helps track the performance of Omnistudio components. It provides insights into how users interact with your apps and identifies areas for improvement. It’s like having a report card that shows you how well your apps are doing.
How It Helps in Performance Tracking
- User Interactions: See which parts of your app users interact with the most.
- Performance Metrics: Track how fast your components load and perform.
- Usage Trends: Understand usage patterns to optimize user experience.
Case Studies of Improved User Experiences
- Customer Service: Faster response times due to better data visibility.
- Sales: Increased sales due to streamlined order processes.
- Healthcare: Improved patient satisfaction with smoother appointment booking.
Conclusion
Let’s quickly go over what we’ve learned about Omnistudio. Omnistudio is a powerful set of tools in Salesforce that helps you build amazing, data-driven user experiences. Here are its main components:
- FlexCards: These are small, interactive cards that neatly show important information.
- OmniScripts: These guide users through processes step-by-step, making sure everything is done correctly.
- Integration Procedures: These work behind the scenes to fetch, transform, and save data without slowing things down.
- DataRaptors: This helps extract, transform, and load data to and from Salesforce.
- OmniAnalytics: This tool tracks how well your Omnistudio components are performing.
Now that you know what Omnistudio can do, I encourage you to explore it further. Try creating FlexCards, and OmniScripts, and using Integration Procedures in your Salesforce environment. You’ll see how much easier it makes your work. By following this conclusion structure, your readers will have a clear understanding of what Omnistudio is, its benefits, and how to start exploring it. They’ll also feel encouraged to engage with the content and look forward to future posts.


